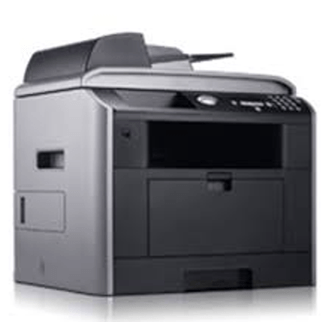
Dell 3110cn is a color laser printer for commercial use. You can use this printer on your computer through a USB cable or connect to your local netowrok through LAN cable. Both the installation require its driver.
You can download the Dell 3110CN driver from the download section given below and from its official website. Both the drivers are the same. I have mentioned the basic driver as well. After download, must read the correct installation method that I have prepared while installing it on my computer. I have shared the steps with you here.
The provided driver will support Windows 11, 10, 8, 8.1, 7, Vista, XP (32bit / 64bit), Server 2000 to 2022, Linux, Ubuntu, and Mac 10.x, 11.x, 12.x, 13.x, 14.x, 15.x operating systems. Let’s start the installation process by downloading the drivers first.
Download Dell 3110cn Printer Driver
To download the driver, you have to determine the operating system version of your computer.
Driver for Dell 3110cn Printer
Type: Full feature driver Operating System: Windows 11, 10, 8, 8.1, 7, Vista, XP, Server 2000 to 2025 File Size: 211 MB Version: 2.5 Download DriverOR
Alternatively, you can download the same drive from Dell’s official website.
How to Install Dell 3110cn Printer Driver in Windows
To install the drivers, you just have to follow the following instructions.
Step 1: Right-click on the PS driver file that you have downloaded from the above and then click on extract to. Basically you have to unzip the driver files into a folder.

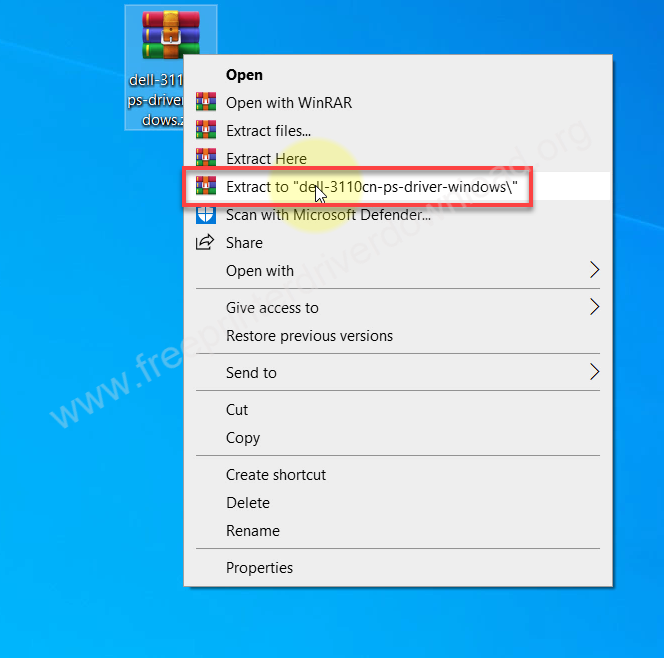
Step 2: It will create a folder in the same location where it has extracted all the driver files. It contains all the driver files it will be the basic driver so you will have to install it manually there is no exe file to install it automatically. Please close this folder for now, we will use it later when the installation wizard asks for the driver.

Step 3: To install it manually you have to click on the start button and then click on settings and then click on devices.

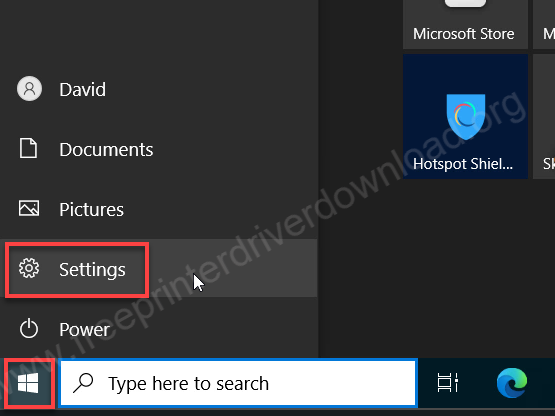
Step 4: Click on devices.

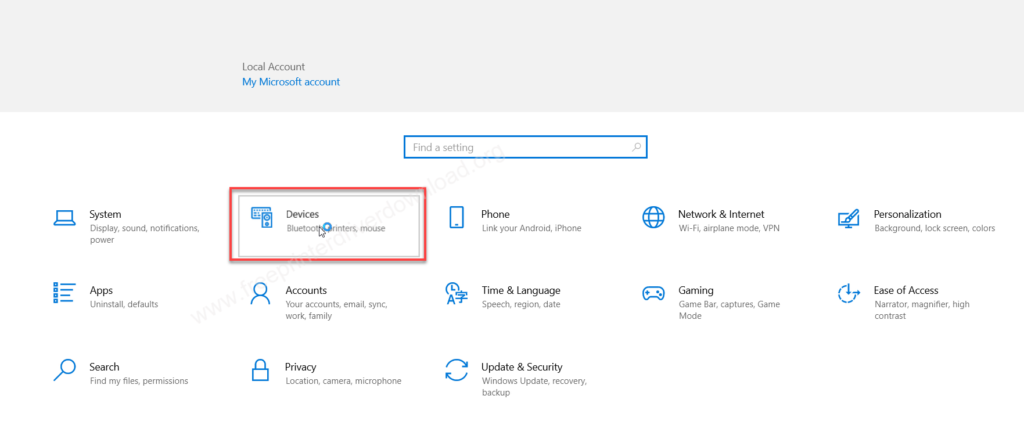
Step 5: Then click on the printer and scanner from the left side pane and then click on the plus icon to add a printer or scanner from the right side pane.

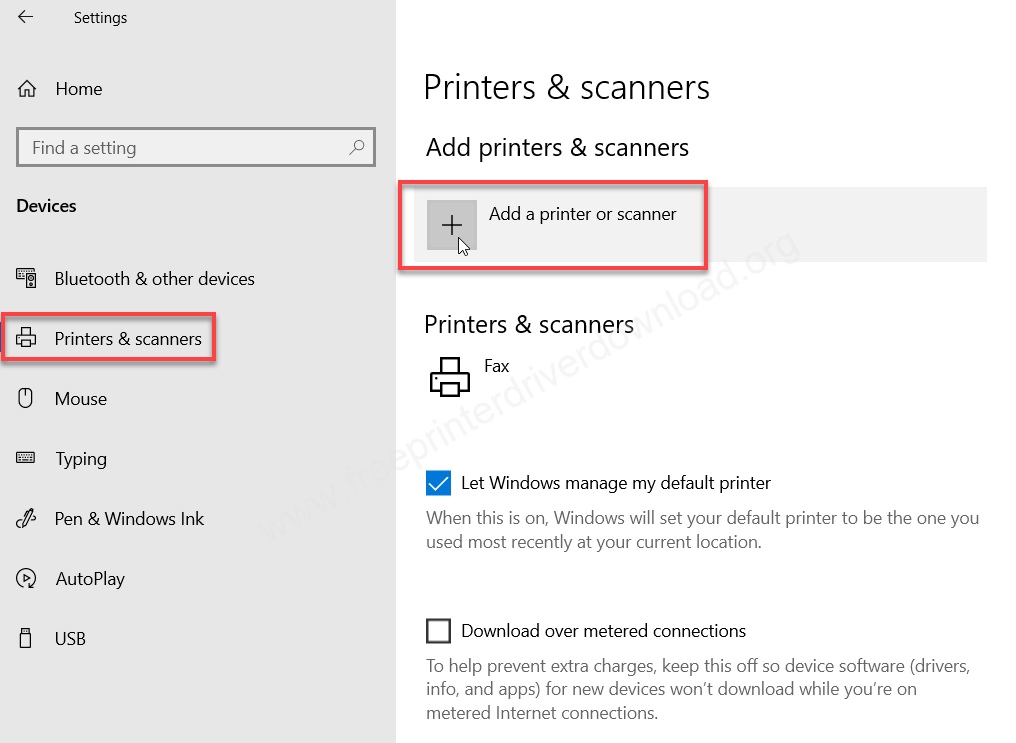
Step 6: Click on the link “The printer that I want is not listed”

Step 7: In the installation wizard you have to choose the last option “add a local printer” and then click on next.


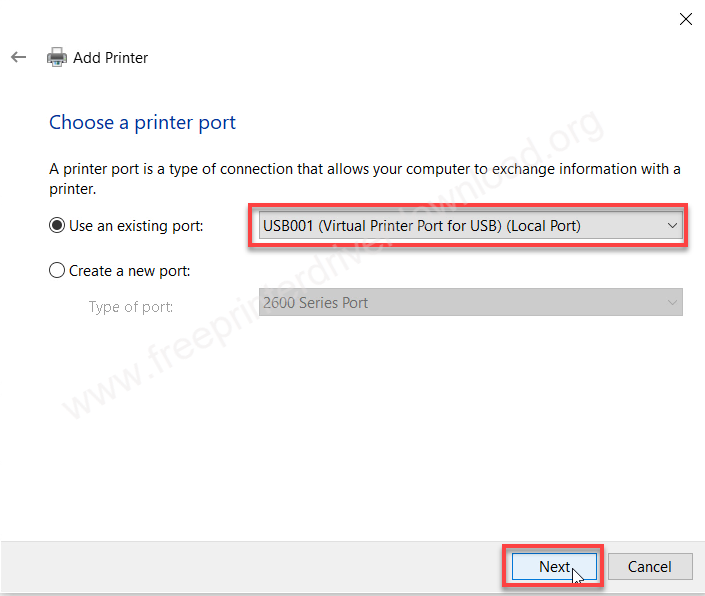
Step 8: Now it will ask you to choose the port where your Pinter is connected right now so I recommend you to choose the USB001 port and then click on next.

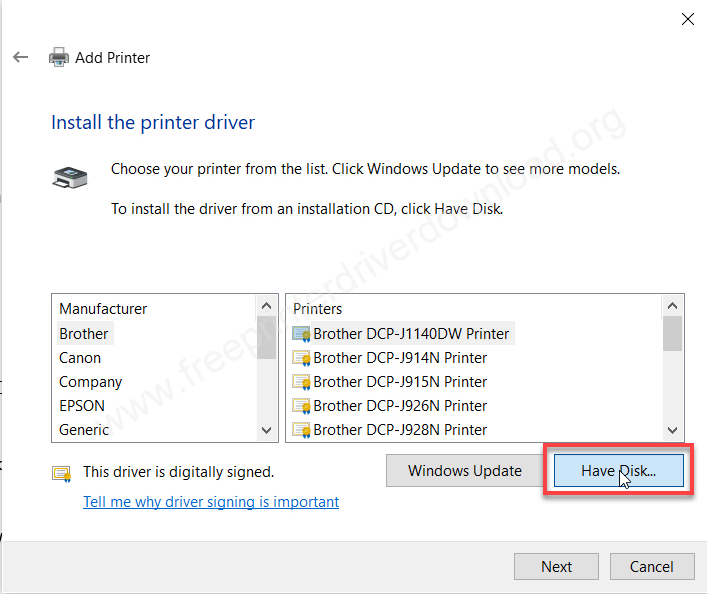
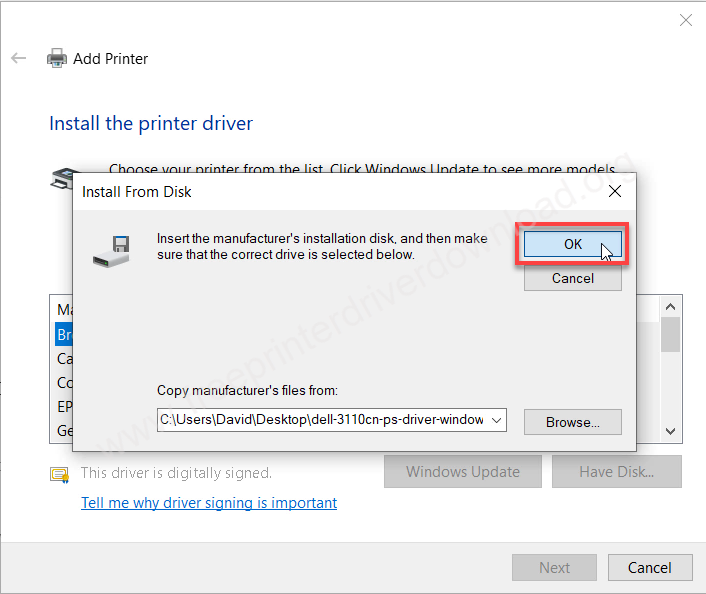
Step 9: Now it is asking for the drivers so here you need to click on “have disk”

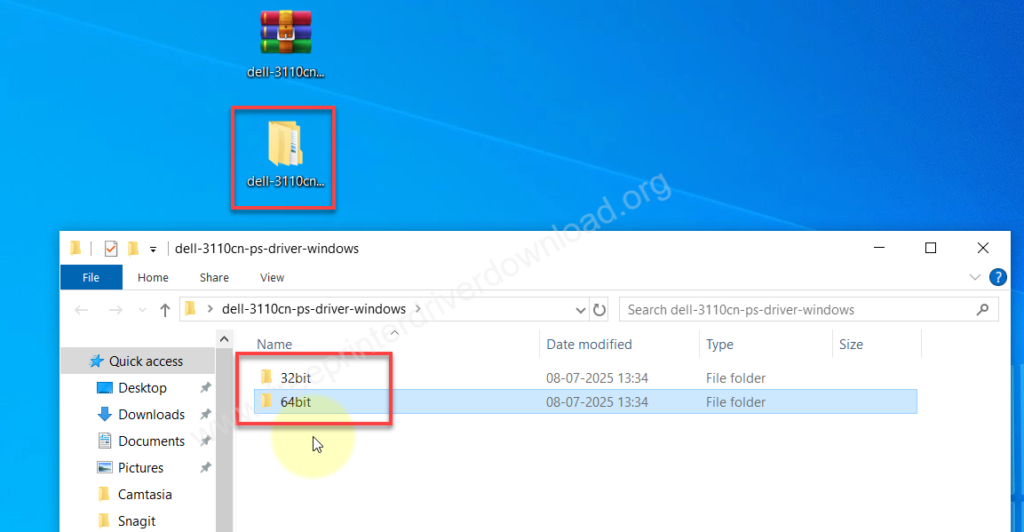
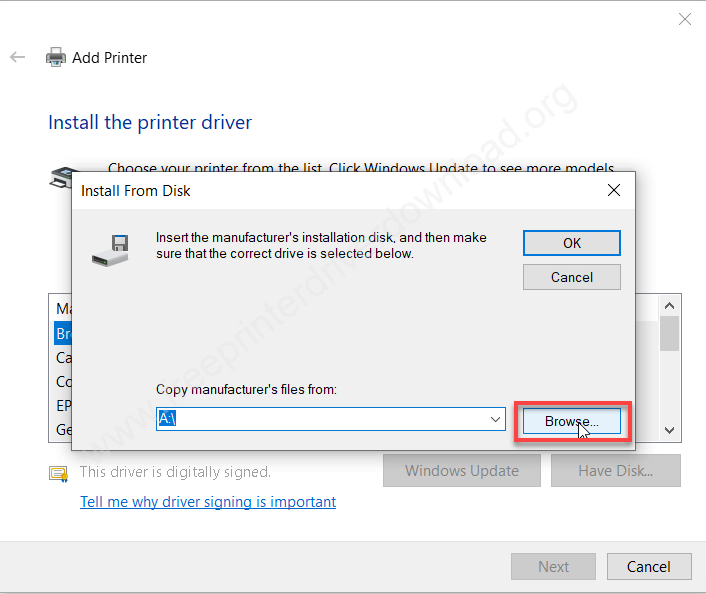
Step 10: Click on the browse button and go to the where you have extracted the drivers.

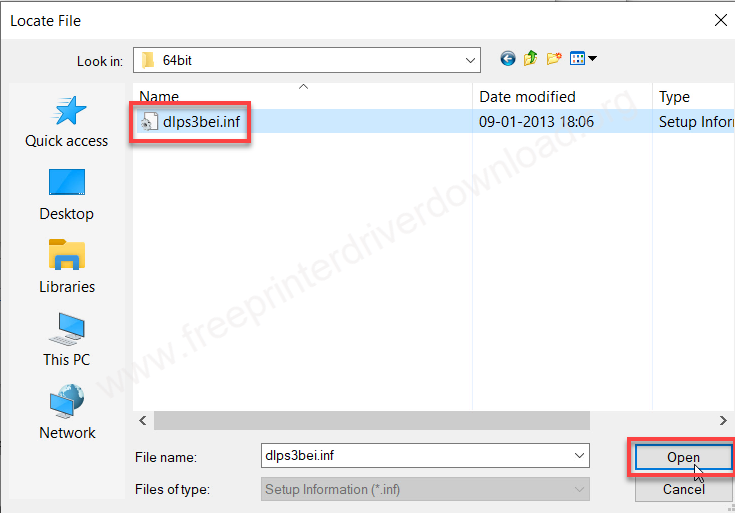
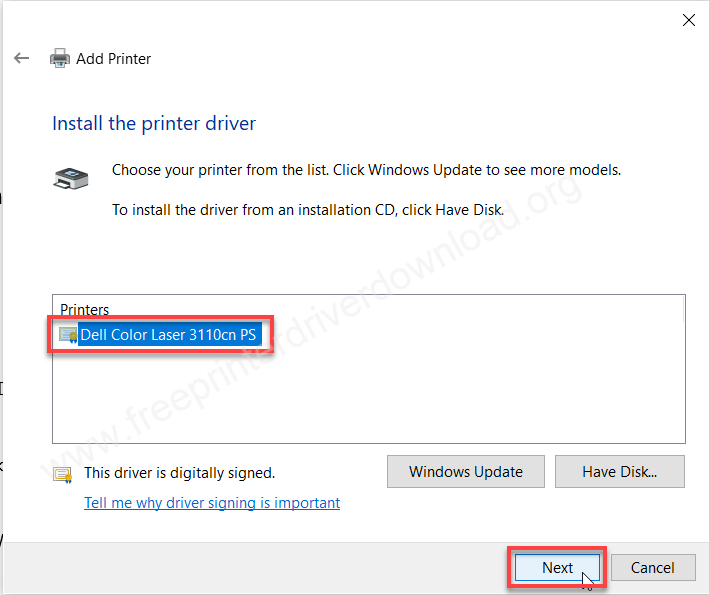
Step 11: After going to the location open 64bit folder and choose the file: dlps3bei.inf and then click on open. Note: My Windows is 64bit, that’s why I chose 64bit, if you have 32bit Windows then you may go to 32bit drivers.

Step 12: Click on OK.
Step 13: Choose the model number of your printer (Dell Color Laser 3110cn PS) from the showing list and then click on next.

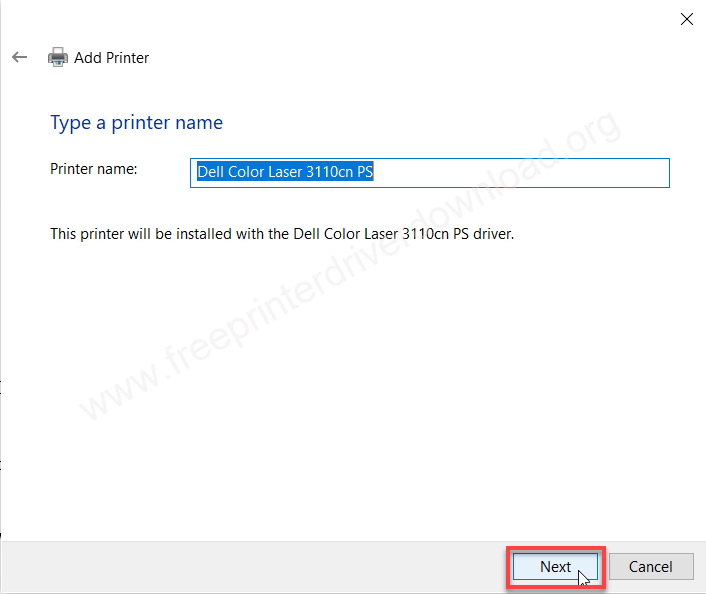
Step 14: Click on next again.
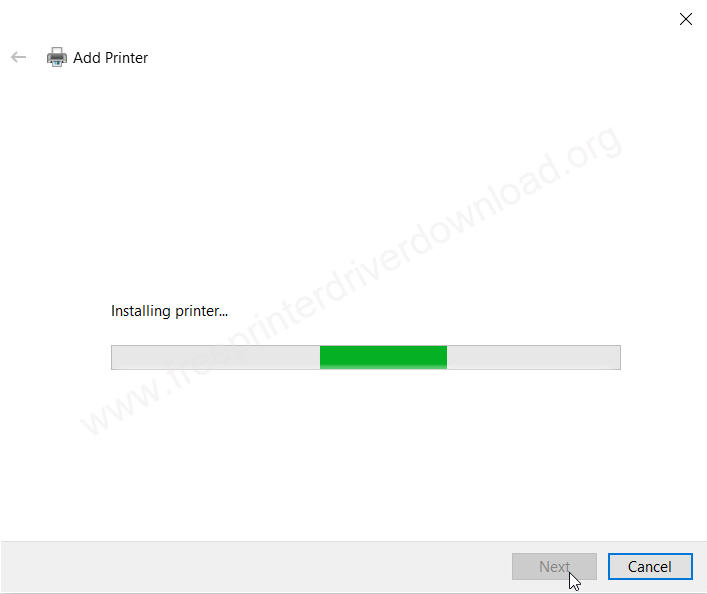
Step 15: It is installing the drivers now so please let it be done.
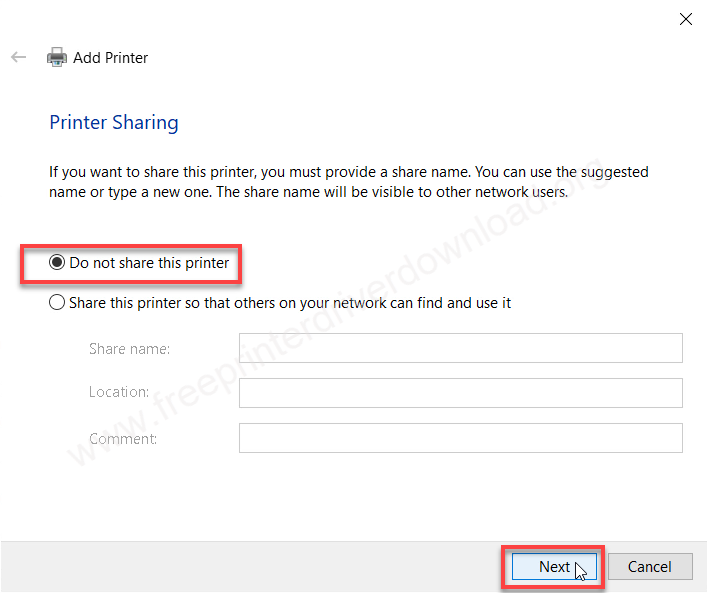
Step 16: Choose the first option “Do not share this printer” and then click on next.

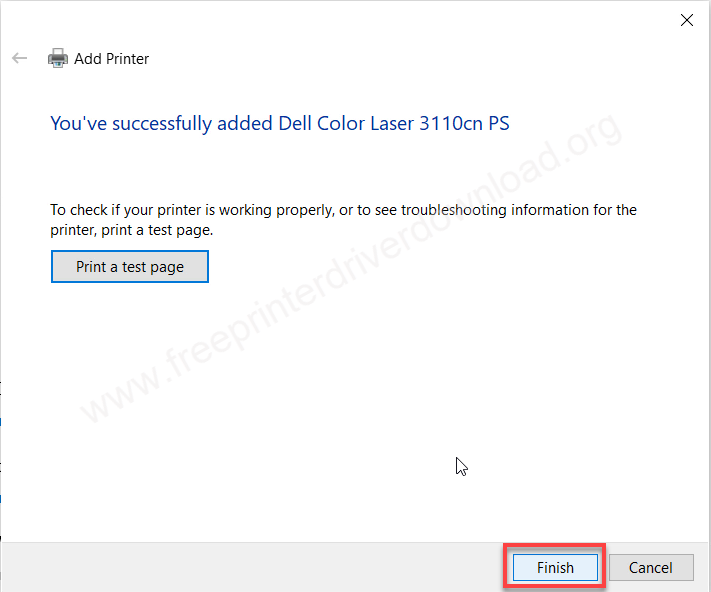
Step 17: The printer Dell 3110cn has been installed successfully please click on finish.

Step 18: Go to the printer’s page and check whether the Dell printer has been installed or not. As you can see the printer has been installed successfully.


That’s it for now. As you have seen how we have installed dell color laser 3110CN printer on the computer you can install this printer with the same method. Hopefully you will do it.
Specifications:
When a laser printer can do color printing, it becomes a unique and perfect combination. The Dell 3110cn printer makes this combination a reality and gives you the chance to use it. So come, let’s learn more about it.
As this is a laser printer, its speed is quite good: it can print up to 32 pages per minute in black and 17 pages per minute in color. It has a print resolution of 600 DPI, which is quite good for a laser printer. Moreover, it has a 400 MHz processor and 128 MB of RAM. This printer also comes with two paper trays – an input tray that can hold up to 250 pages, and an output tray that can hold up to 150 pages.
This printer also has an optional unit that you can add if needed. This unit will make your printer an auto-duplex printer, which means it can print on both sides of the paper automatically without flipping the page manually.
This printer can be connected to a computer using three options: USB port, Parallel port, and Network port. Each of these ports uses a different type of cable, but the same driver can be used. The driver is provided above, and you can download it from there. This printer uses one laser cartridge.