


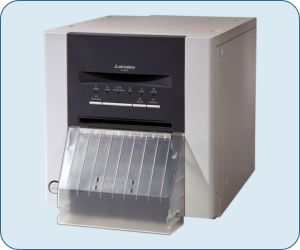
Mitsubishi CP-9550DW (CP9550DW-A) is a professional photo printer designed for instant and high volume photo printing in multiple sizes. This printer uses Dye Sublimation ink of 16 million colors for the crisp, clear and preimum quality print outs. This printer only has one connectivity option which is through the USB port. To install this printer on a computer, you will require its a driver. You will have to download its driver from the download section below. You can download the same driver from the official website as well.
After downloading, you will have to know the proper method to install this printer on your computer. I have given a step-by-step installation guide which will help you to install this printer properly. I suggest you to please follow the following steps to download the driver and then learn how to install it. Let’s start by downloading the drivers first.
Download Mitsubishi CP-9550DW Printer Driver
In order to download the latest version driver, first know the operating system version of your computer and then click on the below given download link accordingly. This printer supports: Windows 11, 10, 8, 8.1, 7, Vista, XP (32bit / 64bit), Server 2000 to 2025, Linux, Ubuntu, Mac OS X 10.x, 11.x, 12.x, 13.x, 14.x and macOS 15 Sequoia, 26.x operating systems.
Driver for Mitsubishi CP-9550DW Photo Printer Driver
Type: Full feature driver Operating System: Windows 11, 10, 8, 8.1, 7, Vista, XP (32bit / 64bit), Server 2000 to 2025 File Size: 2.68 MB Version: 2.31 Download DriverOR
You may download the same driver directly from Mitsubishi’s official website.
Steps to Install Mitsubishi CP-9550DW Printer Driver in Windows
After downloading the driver, you will have to properly install this 9550dw printer on your computer. In order to install the printer you will have to follow the following steps carefully.
Step 1: Right-click on the printer driver and click on “extract to”. Basically we need to unzip the driver file.

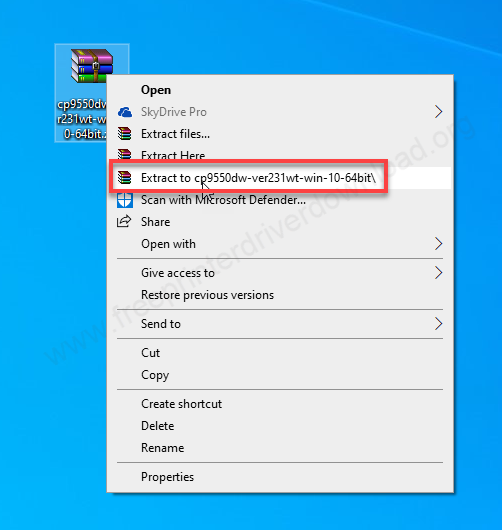
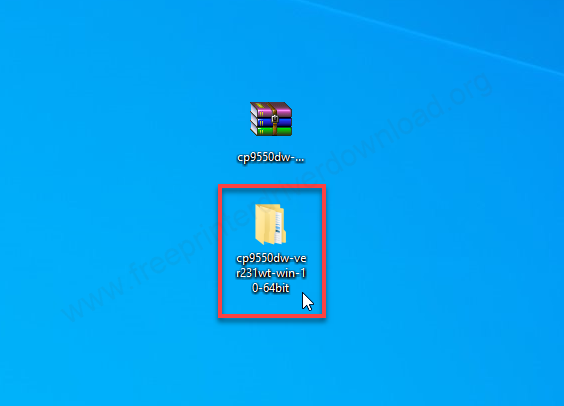
Step 2: It will create a folder at the same location. All the driver files are extracted in this folder. Open up this folder.

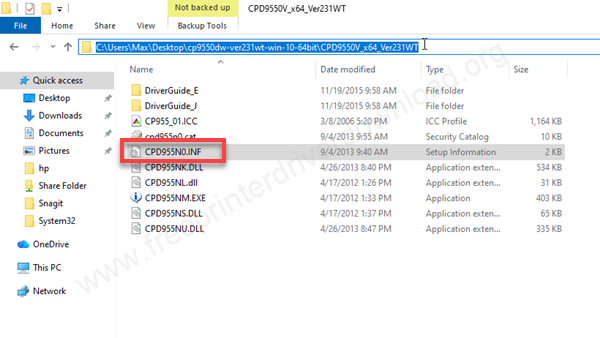
Step 3: In the folder you will get CPD955N0.inf which will be required while installing it manually. Don’t do anything with the file now, just leave it and remember the location of this folder.

Step 4: Let’s installing this printer manually. Click on the Start button.

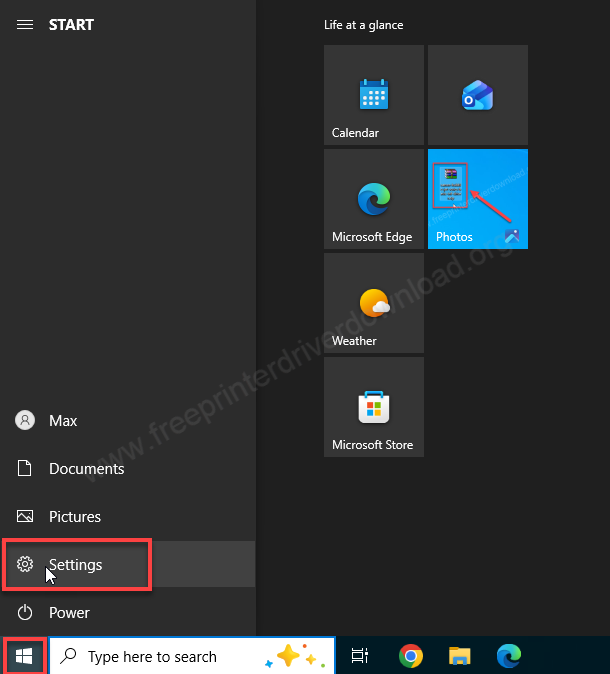
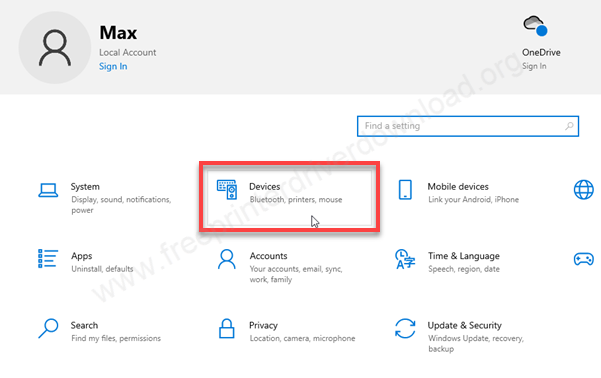
Step 5: Then click on devices.

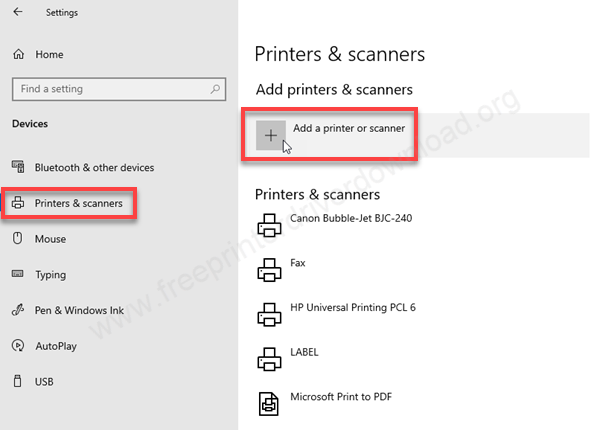
Step 6: Click on “Printers & Scanner” from the left side pane and then click on plus icon (+) “Add a printer scanner” from the right side pane.

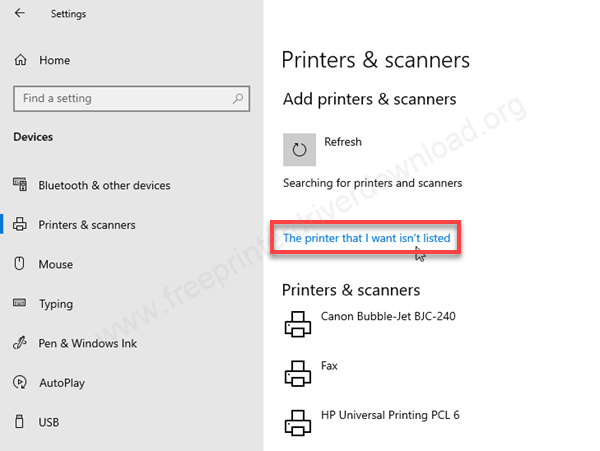
Step 7: After a few seconds, you will get an option “The printer that I want is not listed.”

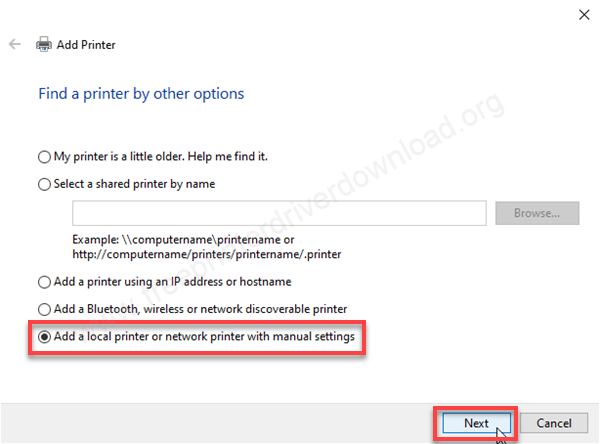
Step 8: Choose the last option “Add a local printer” and then click on Next.

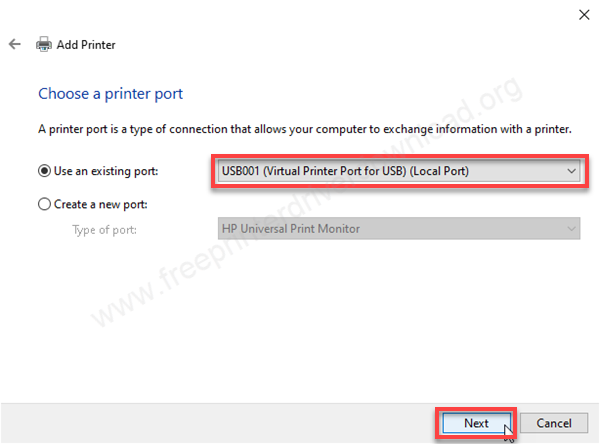
Step 9: Here it is asking for the port (where your printer is connected right now). I suggest you to choose the port USB001 – if you are connecting this printer through the USB cable. Then click on Next.
Step 10: Now it is asking for the drivers. Click on Have Disk.

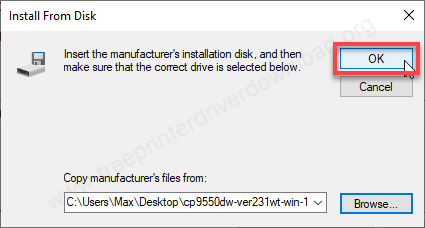
Step 11: Click on the browse button and go to the location where you have extracted the basic drivers.


Step 12: In the folder, choose the driver file: “CPD955N0.INF” and then click on open.


Step 13: Click on OK.
Step 14: Click on the shown driver “MITSUBISHI CP9550D/DW (USB)”
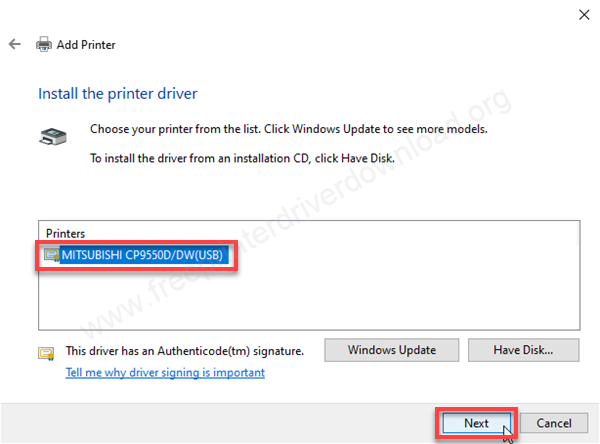
Step 15: Click on Next.

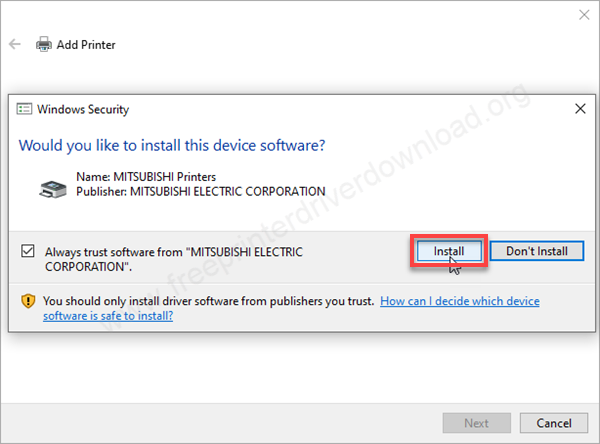
Step 16: Click on Install. If you are not getting this dialog box, it means the “Driver Signature Enforcement Option” is enabled. To get this dialog box, you will have to disable the driver signature option. Here’s how you can disable the driver signature enforcement options: https://youtu.be/LQKg_VTuZCQ.
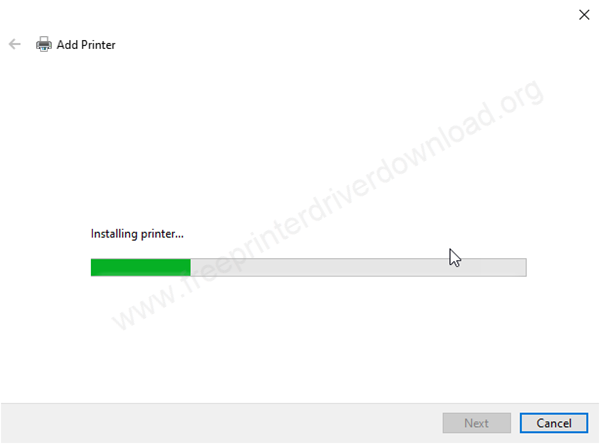
Step 17: It is installing the drivers now, so please wait.
Step 18: Choose the first option “Do not share this printer” and then click on Next.

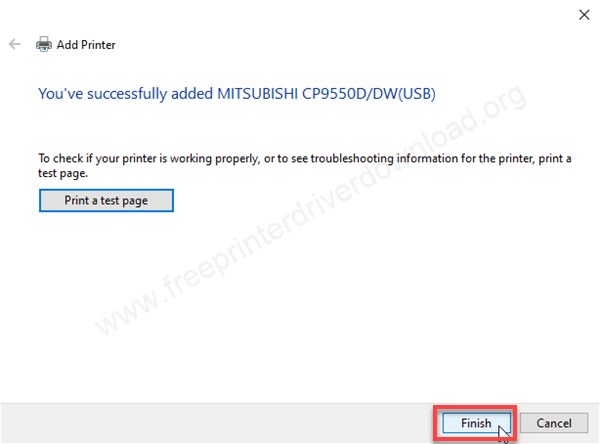
Step 19: The Mitsubishi CP 9550DW printer has been installed successfully. Click on finish to complete the installation process.
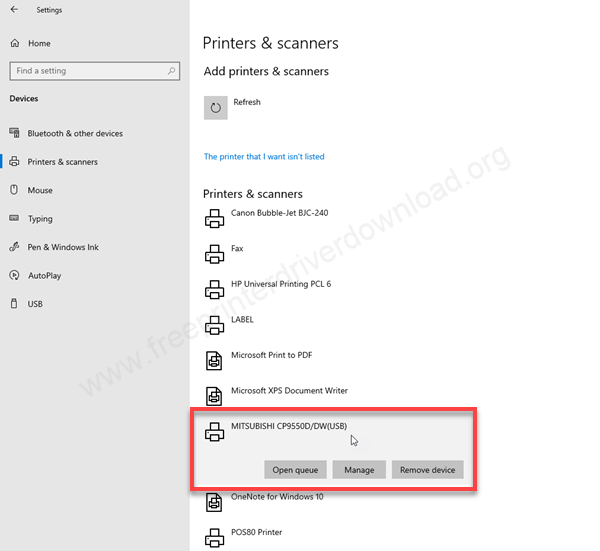
Step 20: Go to the printers page and check whether your printer is installed successfully or not. In my case the printer Mitsubishi CP 9550 dw is shown and installed successfully.

Here’s how you can install the Mitsubishi 9550DW printer driver on your computer. It is so simple, you can also install this printer on your computer by following the same steps, no matter which OS version you have, you just need to follow the same steps. By the way, I have installed it on my Windows 10 64bit laptop.
Specifications:
Mitsubishi CP-9550DW is a professional photo printer that comes with up to 692 dpi resolution for crisp and clear print outs. The print speed of this printer is : 20 seconds to 58 seconds per page depending on the page size. This printer supports the page sizes: 3.5″x5″, 4″x6″, 5″x7″.6″x8″, 6″x9″. It also has a built-in memory of 32 MB SDRAM to handle the multipule print outs.
The power consumption of this printer is 220 watts while printing and 40 watts when it is in standby mode. The total weight of this is 17 kg.
The printer supports: Windows 98, 2000, XP, Vista, 7, 8, 8.1, 10, 11 and Mac Operating System. Instead of in cartridges, it uses ink cassettes. The model numbers of the ink cartridges are: CK9046, CK9046PST, CK9057, CK9069.
This printer uses a “dual line thermal head” technology to print crisp and clear photos. In this printer you can set multiple size papers all together. The main highlight of this printer is its super-fine print quality outs with very high resolution: up to 692 DPI which is extremely good for printing high quality photo print outs. Company has made this printer for economical printing so that you can get lower cost to print photos. It is really super easy to switch from one paper size to another one.
So this is all from my side for this printer. In this article I have explained how to download the printer driver and how to install it and given all the specifications with you so thank you so much for visiting.

