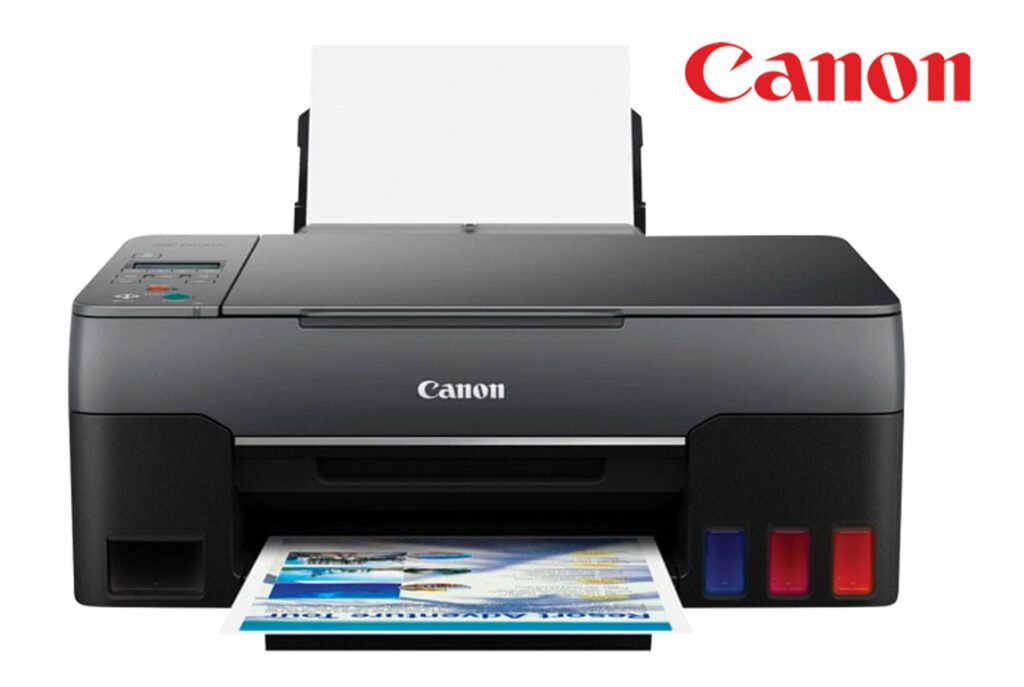
Canon PIXMA G3460 is WiFi colored printer which can print, scan and copy. Canon printers have megatank technology to gives you the economical printing. This printer would be ideal for home & office use. To set up this printer on a computer, you will require its latest version driver. You may download the driver from the download section below.
If you looking to download the driver from its official website only, then go to the download section below, you will get the official download link as well. So, without wasting, go to the download section and download the driver from there.
Download Canon PIXMA G3460 Driver
To download the driver, go to the list below and click on the download link according to the operating system version of your computer.
This printer supports Windows 11, 10, 8, 8.1, 7, Vista, XP (32bit / 64bit), Server 2000 to 2022, Linux, Ubuntu, and Mac 10.x, 11.x, 12.x, 13.x, 14.x Sonoma, 15.x operating systems.
OR
Alternatively, you may download the driver directly from Canon’s official website.
How to Install Canon PIXMA G3460 Printer Driver
In order to install this printer properly on your computer, you need to follow the following steps carefully.
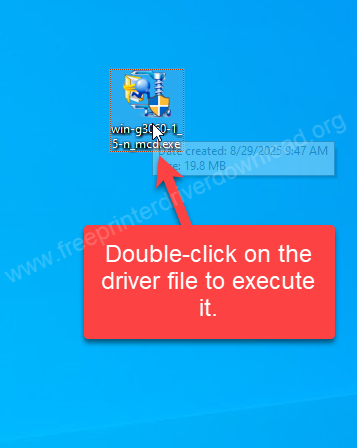
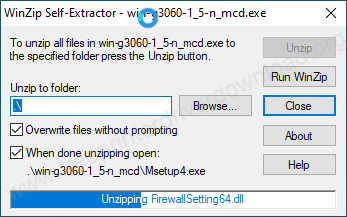
Step 1: Dowload the recomended MP driver from the above given download section and then double-click on the driver file “win-g3060-1_5-n-mcd.exe” that you just have downloaded to execute the installer.
Step 2: It is unzipping the driver files. So please wait for that.
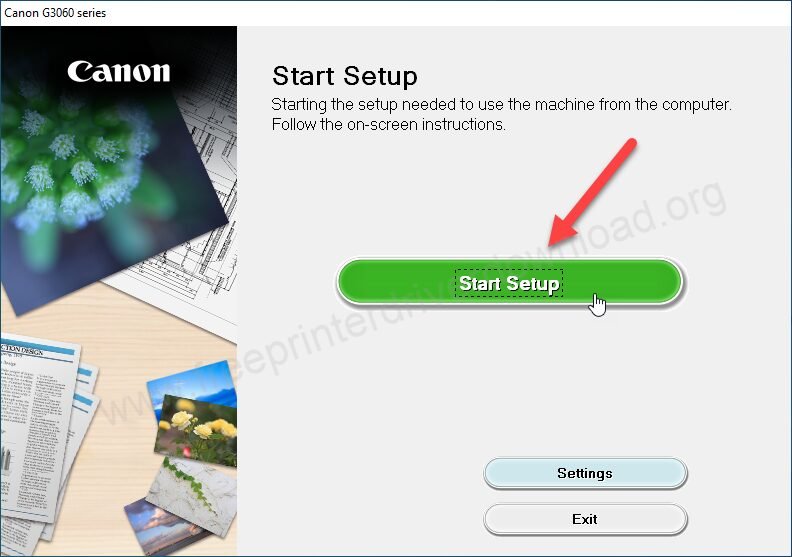
Step 3: Click on the Start setup button.
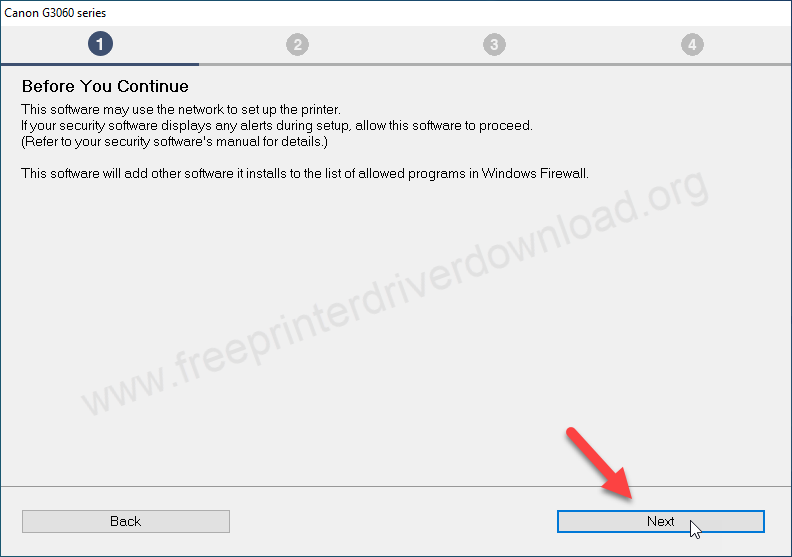
Step 4: Click on Next to allow this installer from the system firewall.
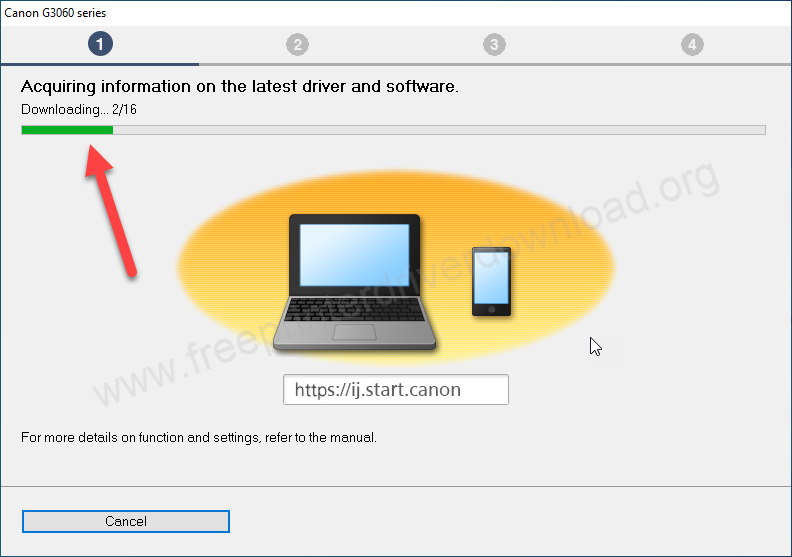
Step 5: It is downloading the latest drivers, so please wait for that.
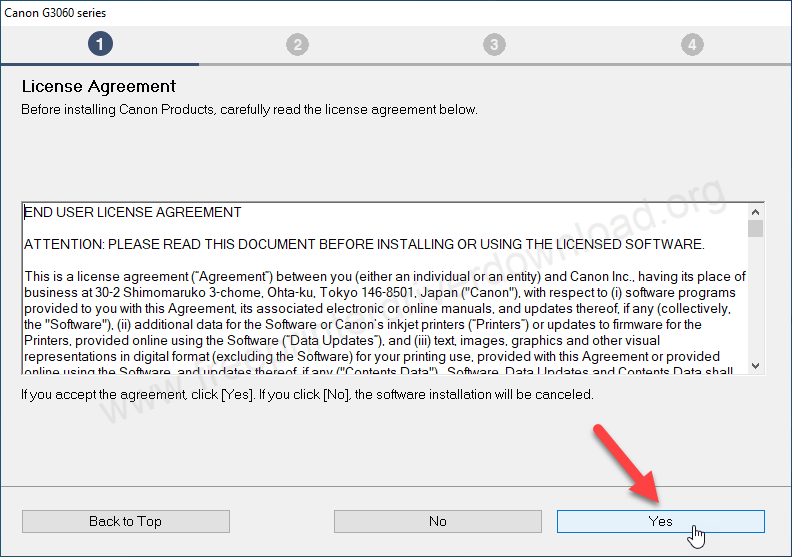
Step 6: Click on Yes to accept the license agreement.
Step 7: Click on Agree to accept the agreement to share the Canon software data to Canon.

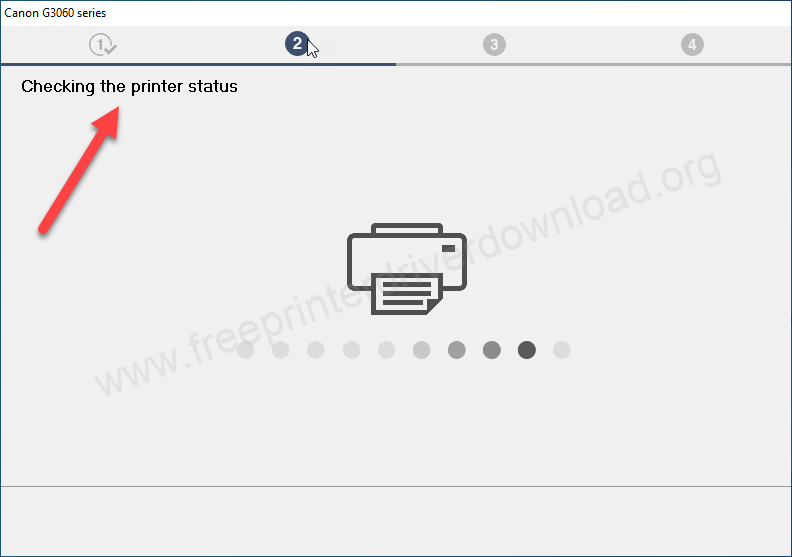
Step 8: It is now checking for the available printers.
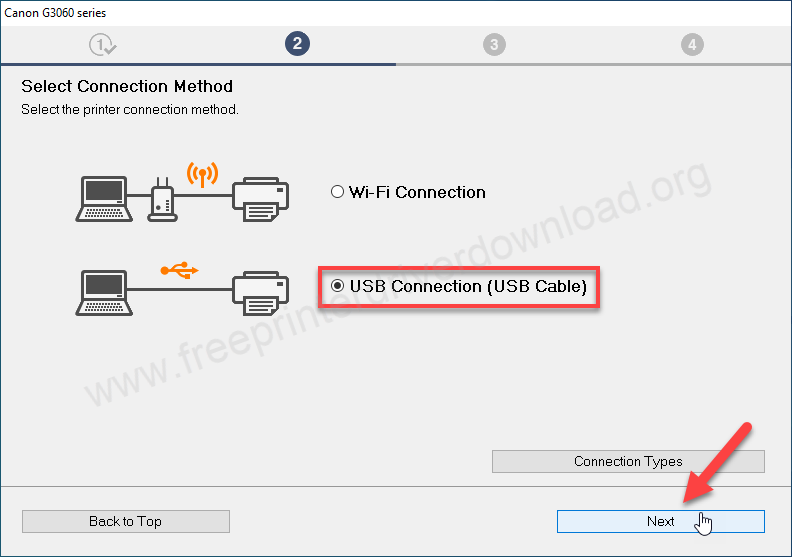
Step 9: Choose the preferred connection type and click on Next. I am going with the USB connection.
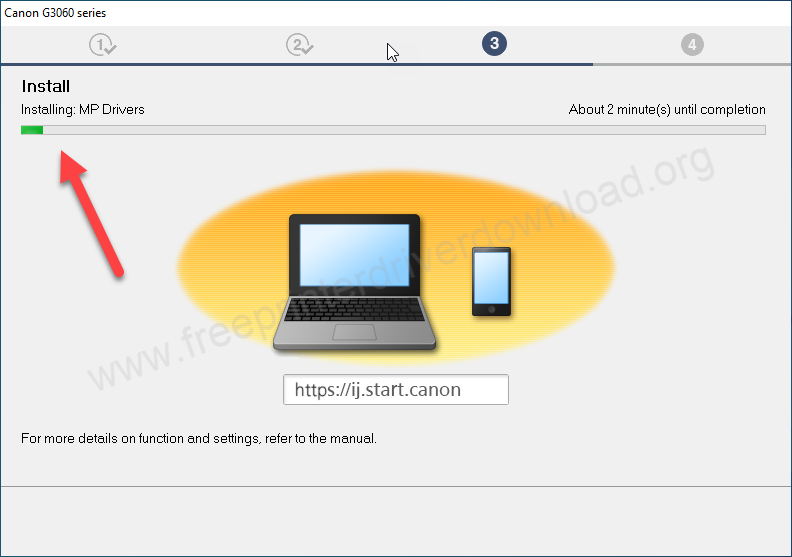
Step 10: It is now installing the MP drivers, so please wait for that.
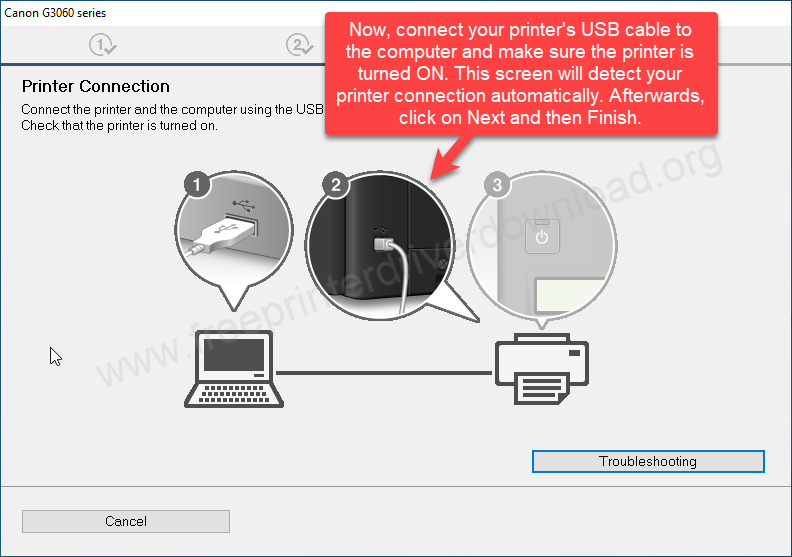
Step 11: Now, please connect the USB cable of your printer from the printer to the computer and make sure the printer is turned ON properly.
Hope you have learned how to install this Canon PIXMA G3460 printer on a Windows computer. I have applied these steps on Windows 10 64bit but you can apply the same steps on Widnows 11, 8, 8.1, 7. Option’s location may be vary but the the steps are the same.
Specifications:
As an inktank printer it uses a print head unit and it is giving is 10.8 IPM which is really very impressive. The color page print speed is 6.0 ipm. It prints borderless pringing which is a very good feature for photo printers. It supports A4 and all the photo size papers. There is no auto-duplex feature, meaning you will have to flip the page manually. The print resolution of this printer is 4800×1200 dpi.
It uses 2 FINE print heads – one black and one color. It can be refilled by its ink bottles. The printer uses GI-41 PGBK and GI-41C, M, Y etc. The color ink gives you around 2200 pages at a time.
It has one input tray that can hold 100 pages at a time. This printer supports A4, A5 and A6 papers. The thickness of the paper should be less than 275mg. It has one flatbed scanner using CIS technology. The scanner resolution of this printer is 600 x 1200 dpi. You mau easily download the scanner driver from the download section above.
It has a single LCD display on the printer which help you to easily navigate the printer. You can use this printer in 32 languages, select your preferred one. There is a two connectiity options: WiFi and USB. This printer supports: Windows, Mac, Linux, iOS and Android OS. All the possible drivers are avialble in the download section above, if you install its full feature driver then you will get IJ Printer Assistant Tool and Easy-Photo Print Editor. The approximate weight of this printer is 6.4 KG and the size of this printer is: Width: 17.52 inches, Depth: 12.99 inches and Height: 6.57 inches.