 Have you lost or damaged the original driver CD of the Epson L5190 EcoTank printer, and now you are looking to download its driver online? If so, then you have reached out to the correct page. Here you’ll find the latest driver download link and a step-by-step installation instructions.
I have divided this guide into two parts: download and installation sections. You can get the Epson L5190 driver download links for Windows 11, 10, 8, 8.1, 7, Vista, XP (32bit / 64bit), Server 2000 to 2022, Linux, Ubuntu, and macOS 10.x, 11.x, 12.x, 13.x, 14.x, macOS 15 Sequoia operating systems in the download section. You will get the installation procedure in the installation section which is given beneath the download section.,
To know how to install this L5190 printer on a Windows based computer, read below given the installation steps of the printer and scanner drivers in the installation section. Let’s start by downloading the drivers first.
Index:
- Go to Download Section
- Go to Installation Section
Steps to Download Epson L5190 Driver
Step 1: Select the operating system where you want to install this Epson printer.
Step 2: Click on the download button to start the download of your Epson L5190 driver setup file.
Driver for Windows
Driver for Mac
Driver for Linux/Ubuntu
OR
Download the driver directly from the Epson L5190 official website.
How to Install Epson L5190 Driver
In this section, you will find a detailed installation guide for full feature drivers and basic drivers (inf drivers). Follow the installation steps in the right guide to properly install the Epson L5190 printer drivers on your computer.
- How to install L5190 printer using full feature driver
- How to install L5190 printer using its basic diver
- How to install L5190 scanner driver using its installer
1) Install Epson L5190 Printer Using its full feature driver
Here, I have explained the installation process of the full feature Epson L5190 driver on a Windows computer. The following installation steps can be used for all versions of the Windows operating system.
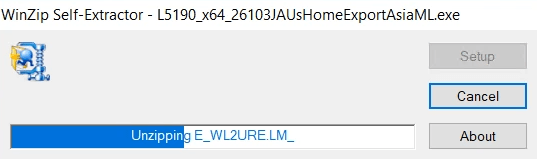
- Run the printer driver file download from this guide and wait for its files to extract on your computer.
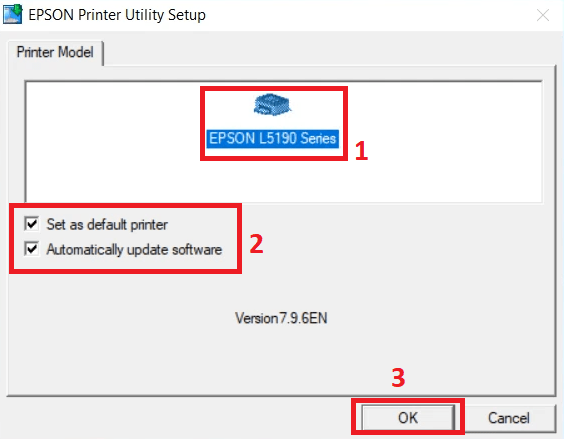
- In the Welcome screen, choose the ‘Epson L5190 Series’ icon, then make sure that the ‘Set as default printer’ and ‘Automatically update software’ options are selected. Finally, click on the ‘OK’ button to proceed.
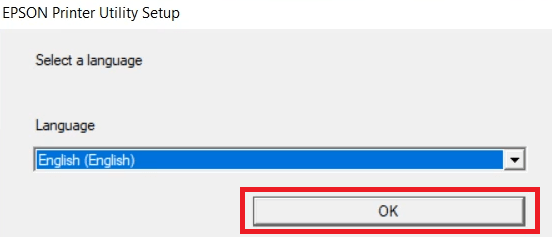
- In the Select a language box, choose your preferred language, I chose ‘English’, then click on the ‘OK’ button.
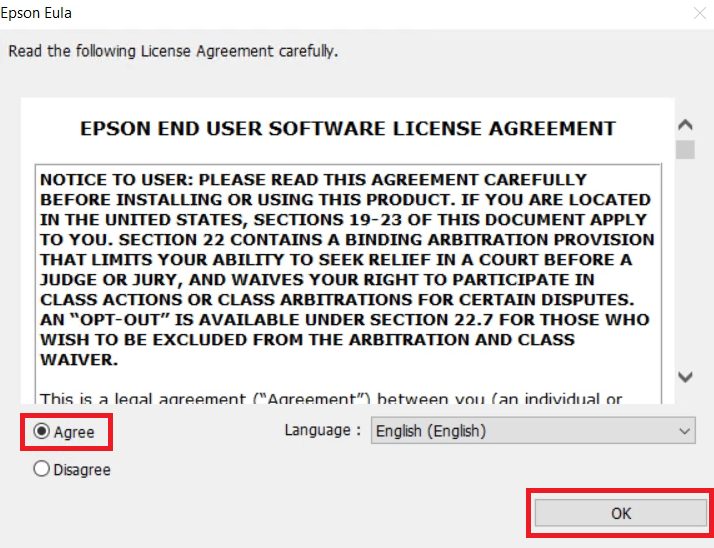
- In the Epson Eula screen, choose the ‘Agree’ option to accept the Epson End User Software License Agreement, then click on the ‘OK’ button.
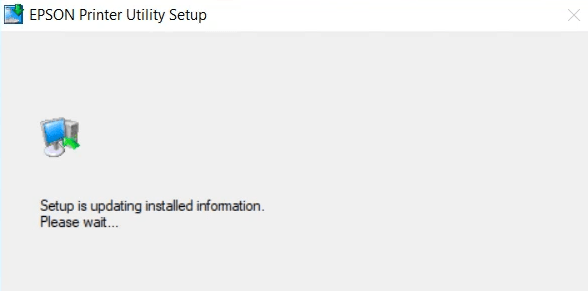
- Wait for the setup program to install the printer driver files on your computer.
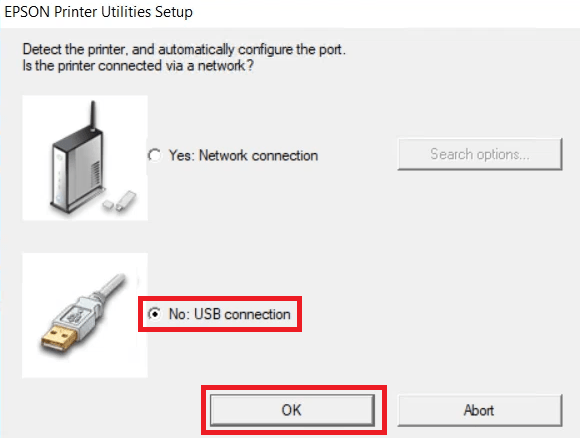
- Choose the ‘No: USB connection’ option, then click on the ‘OK’ button.
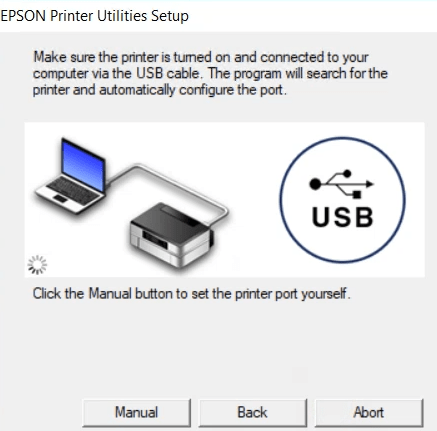
- Connect your Epson printer to your computer using a USB cable, then wait for the setup program to detect your printer and complete the driver installation process.
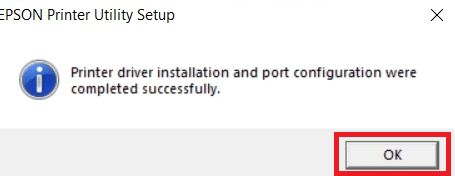
- When you see the message that the printer driver installation is completed successfully, then click on the ‘OK’ button.
That’s it, you have successfully installed the Epson L5190 driver package on your computer. You can now use your Epson printer to print documents and images.
2) Install Epson L5190 Printer Using Basic Driver
In case, you want to install this Epson printer using its Epson L5190 basic driver, then read the installation guide shared below, which describes the installation process for the Epson L5190 INF driver on a Windows computer.
Method 1: How to install a printer driver manually using its basic driver (.INF driver)
3) Install the Epson L5190 Scanner Driver
In this guide, I will describe the installation steps for the Epson L5190 scanner driver on a Windows computer. You can use these installation steps for all versions of the Windows operating system.
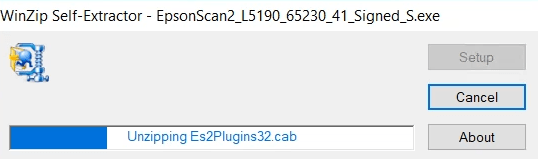
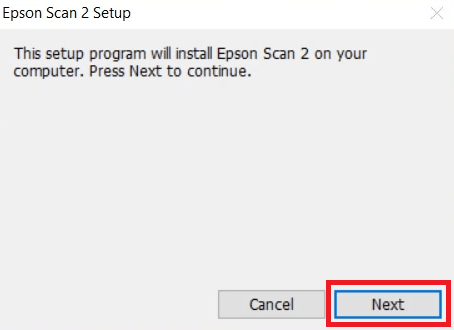
- Run the scanner driver file downloaded from this page and wait for its files to extract on your computer.
- Click on the ‘Next’ button to begin the installation of the Epson Scan 2.
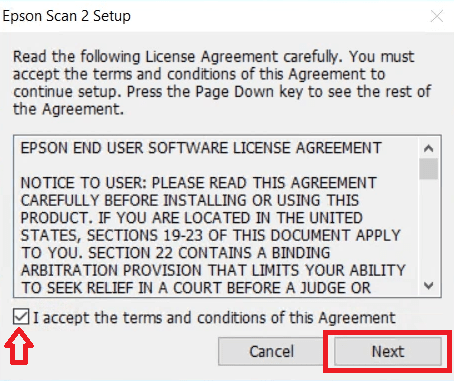
- Choose the ‘I accept the terms and conditions of this Agreement’ option to accept the Epson End User Software License Agreement, then click on the ‘Next’ button.
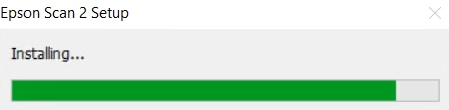
- Wait for the setup program to install the scanner driver files on your computer.
- When you see the message that Epson Scan 2 is successfully installed, then click on the ‘Finish’ button to close the setup program.
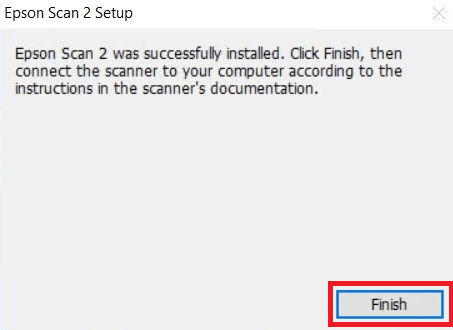
That’s it, you have successfully installed the Epson L5190 scanner driver on your computer. The scanner of your Epson L5190 printer is now ready for use.
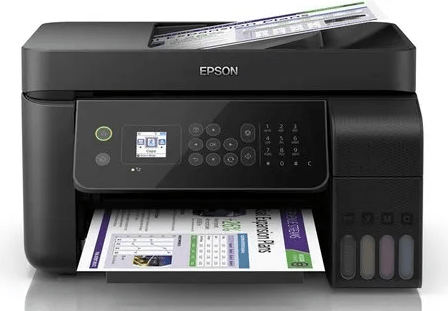
Epson L5190 Features
The Epson L5190 all-in-one printer belongs to the EcoTank series of Epson printers, which means it uses integrated ink tank technology to deliver high quality prints at low costs.
The ink for this color inkjet printer is available in high yield ink bottles, which allows you to print thousands of pages after each refill. This printer supports the Auto Document Feeder feature, which means you can complete multi-page scanning and copying jobs in one go.
You can easily connect this printer to your computer using its USB, Ethernet and Wireless connectivity options.
Which Ink Cartridge is used in this printer?
Ink for this Epson inkjet printer is available in Black (T544120-AL), Cyan (T544220-AL), Magenta (T544320-AL) and Yellow (T544420-AL) color ink bottles. The black ink bottle has a page yield of up to 4500 pages. While the Cyan, Magenta and Yellow ink bottles can print up to 7500 pages per bottle.
| Ink Details | Model Number |
| Black | T544120-AL |
| Cyan | T544220-AL |
| Magenta | T544320-AL |
| Yellow | T544420-AL |