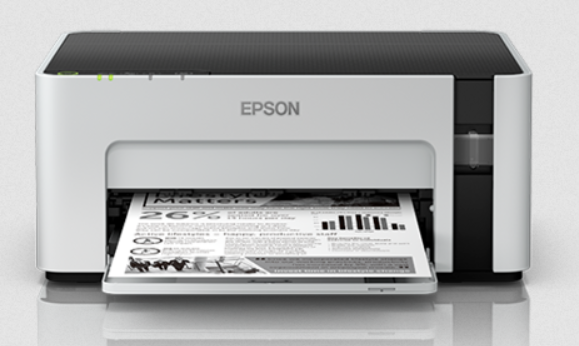
Epson EcoTank M1120 is a single-function printer with ink-tank technology. It is a black & white printer with dual connectivity methods: USB and WiFi. You can connect this printer to your computer through the WiFi and through the USB connection. To connect this printer to your computer you will require its latest version driver. Here on this page, you will get the latest version driver for the Epson M1120 printer. After downloading the drivers you can follow the below given instructions to know the right method to install this on your PC.
Let’s start the installation process by downloading the drivers first. Go to the download section and download the driver from there.
Download Epson M1120 Series Printer Driver
To download the driver, click on the below given download link according to the version of your operating system.
| Drivers | Download Links |
| Full feature driver (Web Installer) for Windows 11, 10, 8.1, 8, Win 7, Vista, XP, Server 2000, 2003, 2008, 2012, 2016, 2019, 2022, 2025 (32bit / 64bit) | Download – Full Feature Driver (Recommended) |
| Basic driver for Windows 11, 10, 8.1, 8, Win 7, Vista, XP, Server 2000, 2003, 2008, 2012, 2016, 2019, 2022, 2025 (32bit / 64bit) | Download 32bit (Basic Driver) Download 64bit (Basic Driver) |
| Full feature driver for Linux & Ubuntu | Download 32bit / Download 64bit |
| Full feature driver for macOS 10.x, 11.x, 12.x, 13.x, 14.x, 15.x | Download |
OR
You may download the same drivers from Epson’s official website.
How to Install
After downloading the drivers, you should know the correct method to install it. Please follow the following steps to find out the correct method to install this printer on your computer.
Installation Guide:
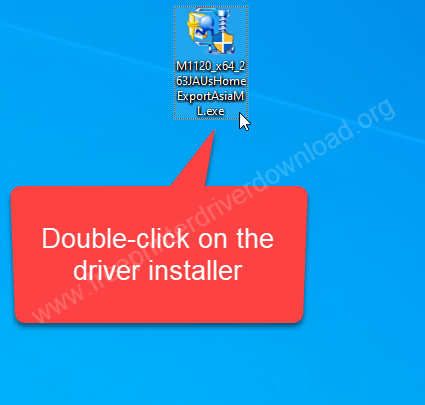
Step 1: Double-click on the “M1120_x64_2_63JAUsHomeExportAsiaML.exe” to execeute the driver installer.
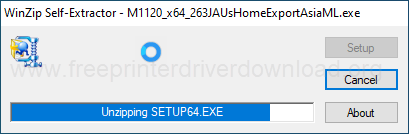
Step 2: Unzipping the driver files.
Step 3: Select the model number “Epson M1120 Series” and then click on Next.
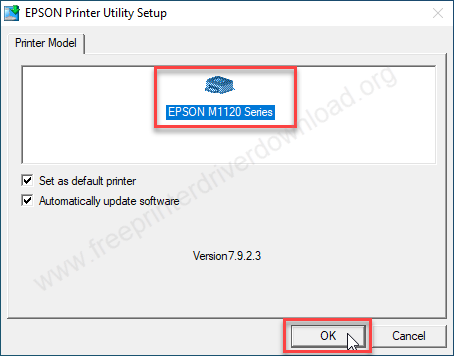
Step 4: Click on OK.

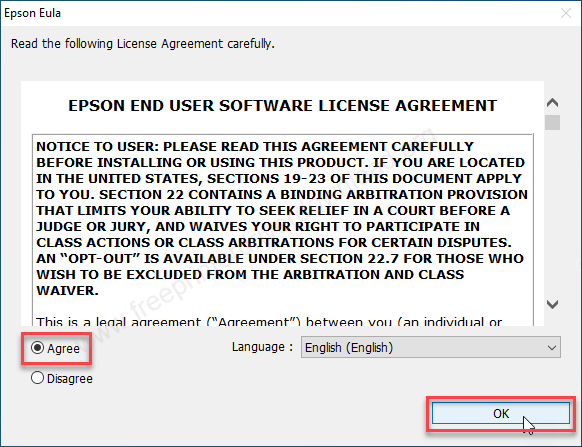
Step 5: Tick the check box “Agree” and then click on OK.
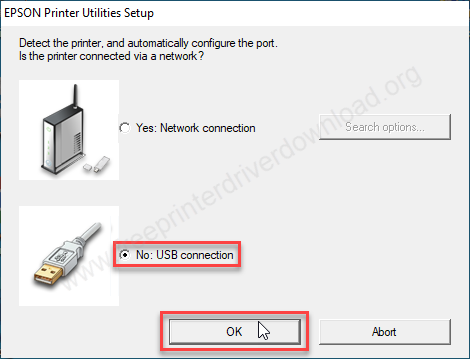
Step 6: Choose your preferred connection type and then click on “OK”.
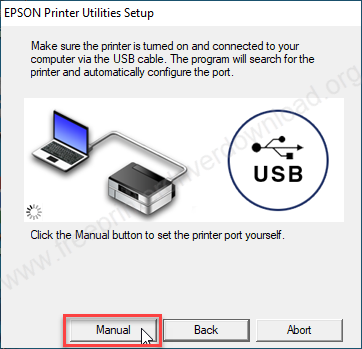
Step 7: The driver installer is now searching for the printer. Please connect the USB cable of your printer to the computer and make sure the printer is turned ON. If it is not detected, click on the “Manual” button.
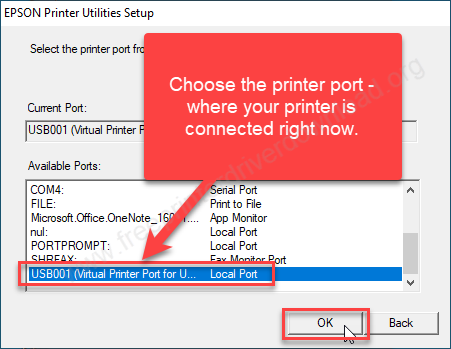
Step 8: Now choose the printer port – where your printer is connected right now.
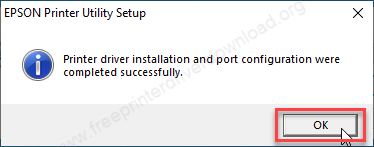
Step 9: Boom!! the printer Epson M1120 has been installed successfully. Click on the OK button to finish.
So this is how you can install this printer on your computer. Hopefully you’ll now be able to install this printer on your computer.