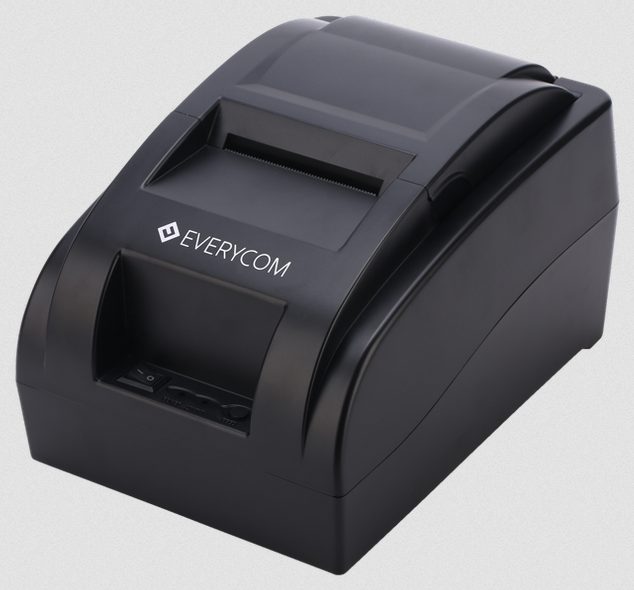
 Finding the latest version driver of the Everycom EC 801 printer should never be easy because the Everycom company has shutdown their official website – where the drivers were listed. That’s why I have prepared this guide where I will provide the direct download link of Everycom EC 801 driver setup file.
Downloading the right driver is not enough, you will have to install it with the correct method. I have also provided a detailed step-by-step installation guide so that you can get idea how to install it. So, let’s start the installation process by downloading the drivers first.
Download Everycom EC 801 Printer Driver
- In the OS list, find the OS version where you want to install this printer.
- Click on its download button to start the download of Everycom EC 801 driver setup file.
Everycom EC 801 Printer Driver for Windows
Basic printer driver for Windows XP, Vista, 7, 8, 8.1, 10, 11(32, 64-bit)
Download (32, 64-bit)
File Name: everycom-ec-801-printer-driver.exe
Size: 2.0 MB
Version: NA
Type: Basic driver
Language: English
Driver Pack Contains: Printer driver
————————————————————
Full feature driver for Windows Server 2003 to 2025 (32, 64-bit)
Download
Driver for Mac
Basic driver for macOS
Download
Driver for Linux
Basic driver for Linux and Ubuntu
Download
OR
Download the driver directly from the Everycom EC 801 printer official website.
How to Install Everycom EC 801 Printer Driver
Here, I will describe the download and installation steps of the latest Everycom EC 801 printer driver. In the first two steps, you will learn about download process, in the last two steps, you will learn about the driver installation.
Step 1: Find the Driver
- You can download the latest version driver either from the Everycom website or from the Downloads section of this guide.
- In the Everycom website, go to the support/downloads section.
- Enter the details of your printer model (EC 801), then search and find for the drivers which are suitable for your OS version.
Step 2: Download the Driver
- Click on the download button related to your preferred driver.
- Wait for the driver setup file download to complete.
Step 3: Install the Driver
- Locate the newly downloaded driver setup file, usually it will be in the Downloads folder.
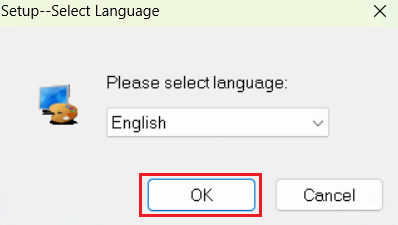
- Run the setup file, then select your preferred language and click on ‘OK’.
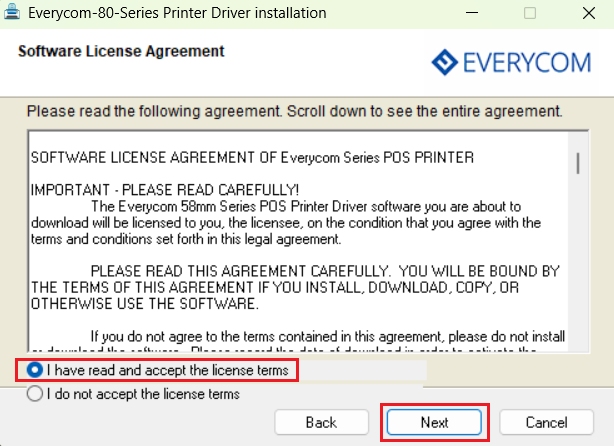
- Select ‘I have read and accept the license terms’ option, then click on ‘Next’.
Step 4: Connect the Scanner
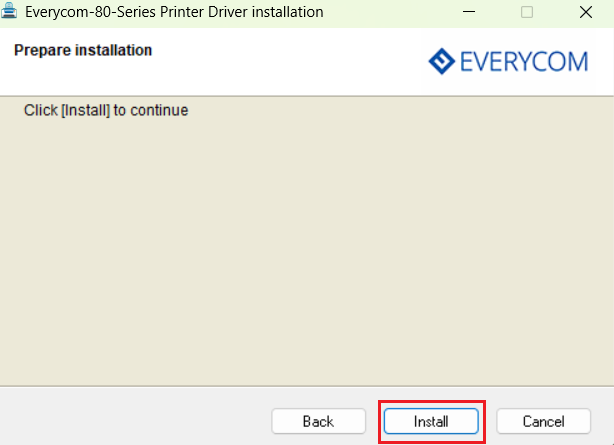
- Click on ‘Install’ to start the installation process.
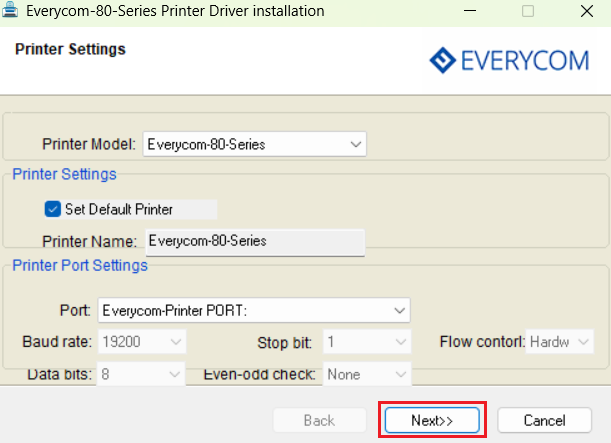
- Select USB port for connecting this printer and make sure your printer is powered on and connected with the USB port of your computer, then click on ‘Next’.
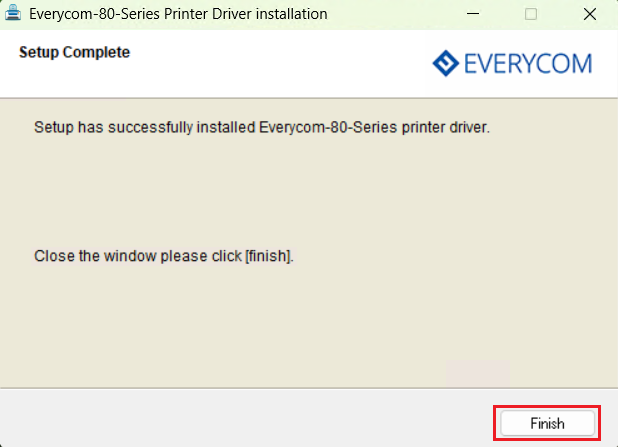
- Click on ‘Finish’ to close the installer program.
More information about installation:
- How to install the printer driver with its installer
- How to install the printer driver manually using its basic driver
That’s it, installation of the Everycom EC 801 printer has successfully completed.
More details about the drivers
Hardware Name: EC 801
Hardware ID: EC801UL
Connection Type: USB/Ethernet Connection
Installer Type: Setup File (with Installer)
Driver Compatibility
This printer supports Windows XP or later OS versions, and also Linux/Ubuntu operating system. However, this thermal printer doesn’t support Windows Server and Mac operating systems.
Driver Update
Each new driver version solve the bugs which were causing problem with your printer in its older versions. Therefore, updating your printer driver with its latest version can permanently resolve a lot of minor issues which sometimes go unnoticed.
Supported Operating Systems
Windows
Linux