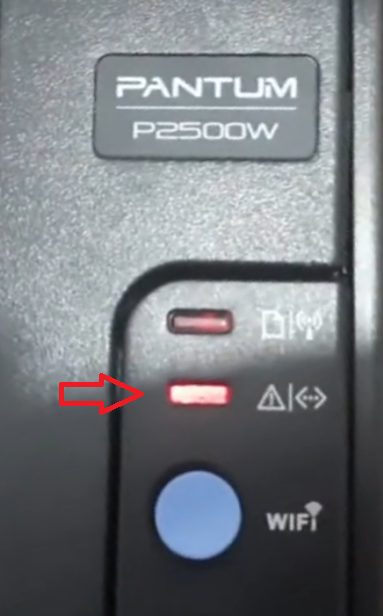
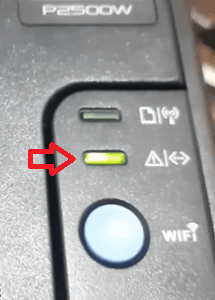
If your Pantum P2502W laser printer has stopped printing and the LED light on its control panel continuously blinks in red color, then we have the solution for this problem. In this repair guide, we will explain in detail the exact steps to solve this problem.
How to Fix Red Light Blinking in Pantum P2502W
In order to resolve this error, you need to replace a connecting cable inside your Pantum laser printer. Therefore, before starting the below mentioned repair process you must arrange a new connecting cable, because you will need it during the repair process. Carefully read the instructions given below and follow them in their correct order to complete the repair process without making any errors.
- As you can see, the red light is blinking the moment you turn on your Pantum P2502W printer. Now, pull out the power cable from the back of your printer to cut the power supply of your printer.
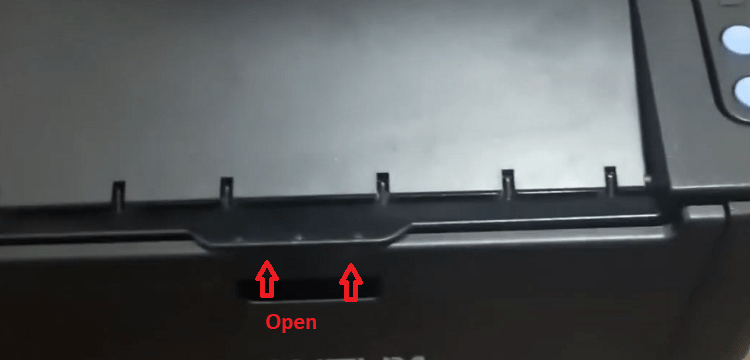
- Lift and open the top lid of your printer.
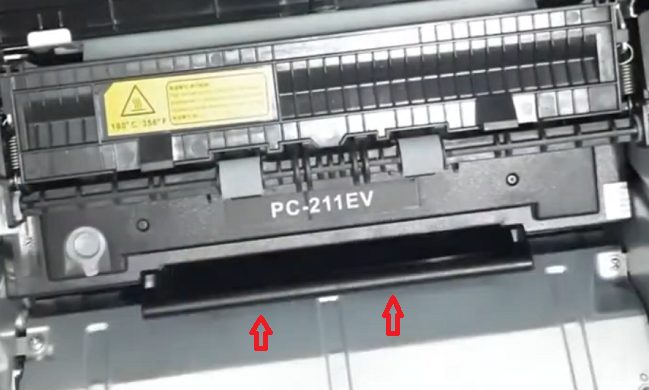
- Pull out the toner cartridge from its position.

- Open the two screws on the right and left side of the printer.

- Gently unlock the right-side cover of your printer by using a small screwdriver, then pull out the small strip attached to the cover so that you can completely remove the right-side cover. Also, remove the left-side cover and the top cover of your printer.

- In the front facing cover you will find four screws (two each side). Open them one by one, then remove the front facing cover completely.

- Now you will be able to see the damaged cable which is causing the red-light blinking error. Its time to replace this cable with a new undamaged cable.
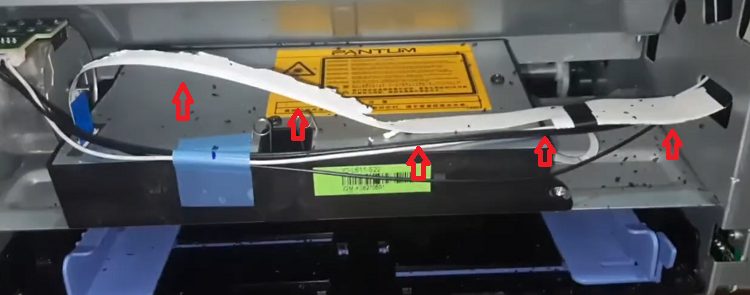
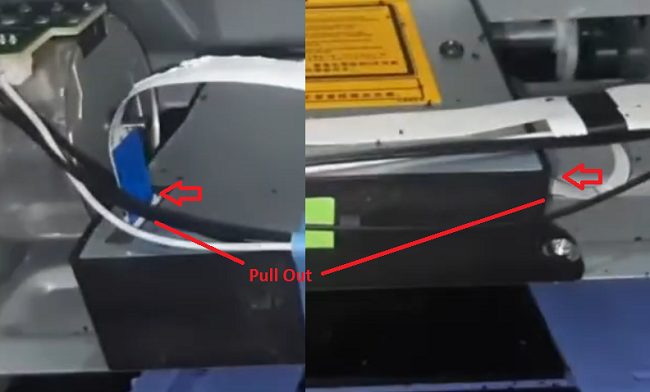
- Pull out the cable at the two places where it’s connected to the printer.
- Turn the printer to bring the right side to the top and remove all the cables which are connected to the green PCB board.

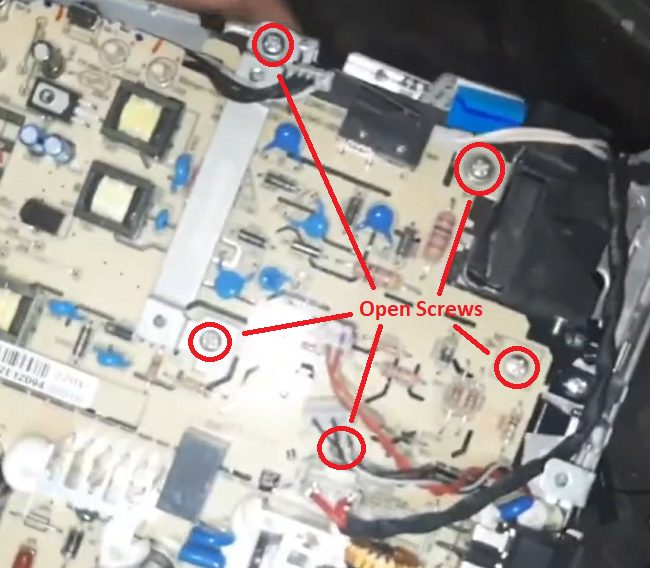
- Remove all the screws which you can find on the PCB board and remove the green PCB board.

- Remove all the screws which you can find on the white PCB board, then remove the white PCB board.
- Below the white PCB board, you can find a black colored cover, which can be removed. Gently remove this black colored cover.
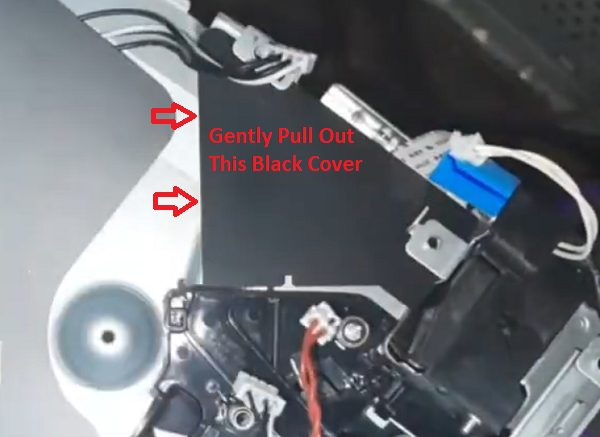
- Now you can clearly see the cable which you need to replace to get rid of the red-light blinking error in your Pantum printer. Gently, pull out this cable from your printer.

- Connect the new cable to the printer in the same sockets where the original cable was connected as shown in Step 8.

- Push the other end of the cable through the hole on the right side to send the cable to the other side.

- Make sure that the cable is placed properly on the right side as it was originally placed.

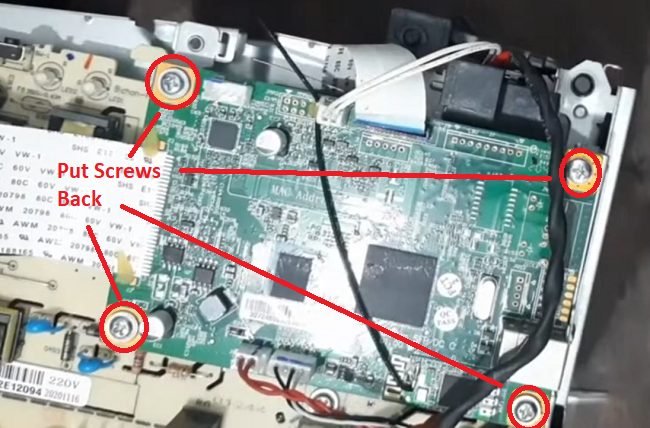
- Put the white PCB board back in its place and start tightening its screws back into their original positions.

- Put the green PCB board back in its place and tighten all the screws back into their original positions.
- Reconnect all the cables which you had disconnected in Step 9.

- Make sure that the cable is properly tucked-in into its position on the front side.

- Put the front cover into its original position, then replace the screws and tighten them properly.

- Reattach the black strip to the right-side cover of your printer and replace the right-side cover properly. Make sure that the right cover is properly locked into its position.

- Replace the left-side cover and top cover back into their original positions. Finally, tighten the screws which were holding the left-side and right-side cover as shown in the image below.

- Put the toner cartridge back into its original position and make sure its well-placed.
- Reattach the power cable to the back of your printer, then switch-on your printer and you will now be able to see the green light.
That’s it, you have successfully fixed the Pantum P2502W printer red light is blinking error and your printer is ready for printing.
Now you know how to fix it if the Pantum P2502W printer red light is blinking / turned on. The repair steps of this problem may seem difficult to follow, but you can successfully execute them if you study and implement them carefully.