Printer Driver Software DownloadPrinter Driver Software Download
  • Home
  • Printer Drivers
    • Brother
    • Canon
    • Dell Printer Drivers
    • Lexmark
    • Samsung
    • Epson
    • Request for Printer Driver & Software
  • Tutorials
  • Printer Troubleshooting
  • Disclaimer
  • Contact us
Font ResizerAa
Printer Driver Software DownloadPrinter Driver Software Download
Font ResizerAa
Search
Follow US
Home > Epson > How to Scan Multiple Pages PDF through Epson Printer
Epson

How to Scan Multiple Pages PDF through Epson Printer

Amit
Last updated: August 25, 2021 11:16 am
By Amit
3 Min Read

Epson scanners are well known for their good quality scans and are bundled with many features which makes your scanning process simple and fast. One such feature is to scan multiple pages of a document, newspaper, book or magazine and save them into one PDF file. This is an extremely useful feature, but many users don’t know how to use it. Therefore, in this tutorial, we will describe how to scan multiple pages PDF through Epson printer by using its in-built scanner.

How to scan multiple pages PDF file

Steps to Scan Multiple Pages PDF through Epson Printer

The steps given below can be followed for all Epson scanners, including single function scanners, all-in-one printer scanners, etc. All you need to do is follow the steps given below in their correct order and within a few minutes you can convert multiple pages into a PDF file on your computer.

  1. Place the page you want to scan on your Epson scanner.
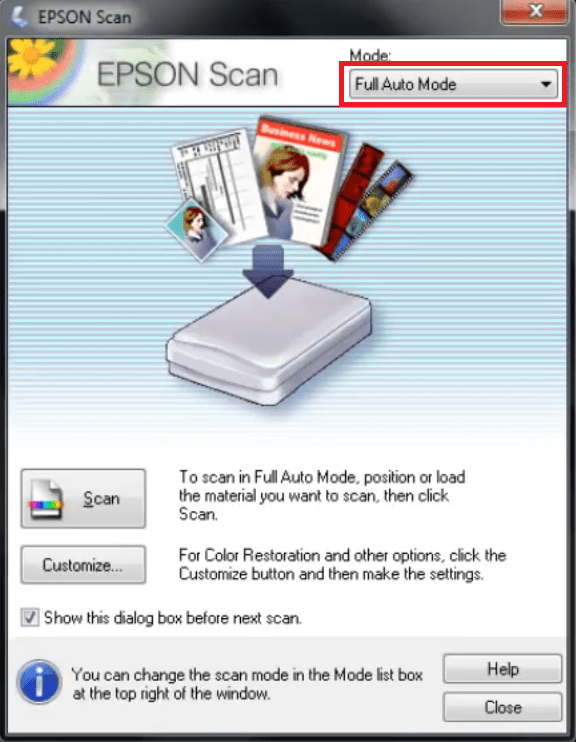
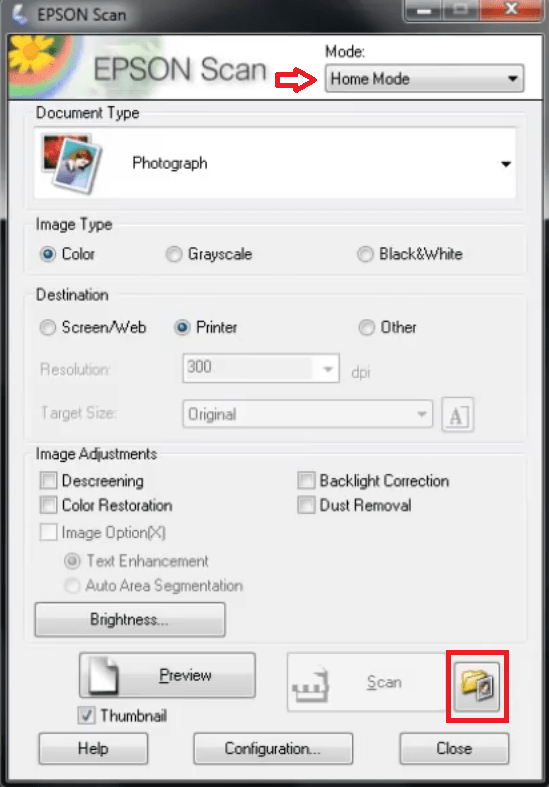
  2. Find and open the Epson scanner software. In the ‘Mode’ section of the scanner software click on the ‘down arrow’ to choose between the ‘Home Mode’, ‘Office Mode’ or ‘Professional Mode’.
    software
  3. After selecting the preferred mode, click on the ‘File Save Settings’ icon. In some Epson software the icon can be different from the one shown in the image below. Basically, you have to click on the link that decides where the scanned file goes.
    settings
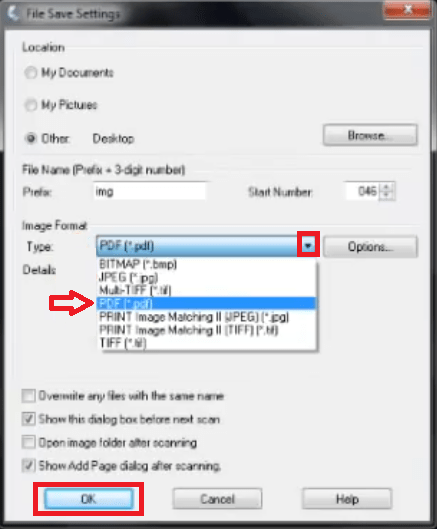
  4. Click on the ‘down arrow’ associated with the Image Format field. From the drop-down list, select ‘PDF’ option. Then, click on the ‘OK’ button to finalize settings.
    ok
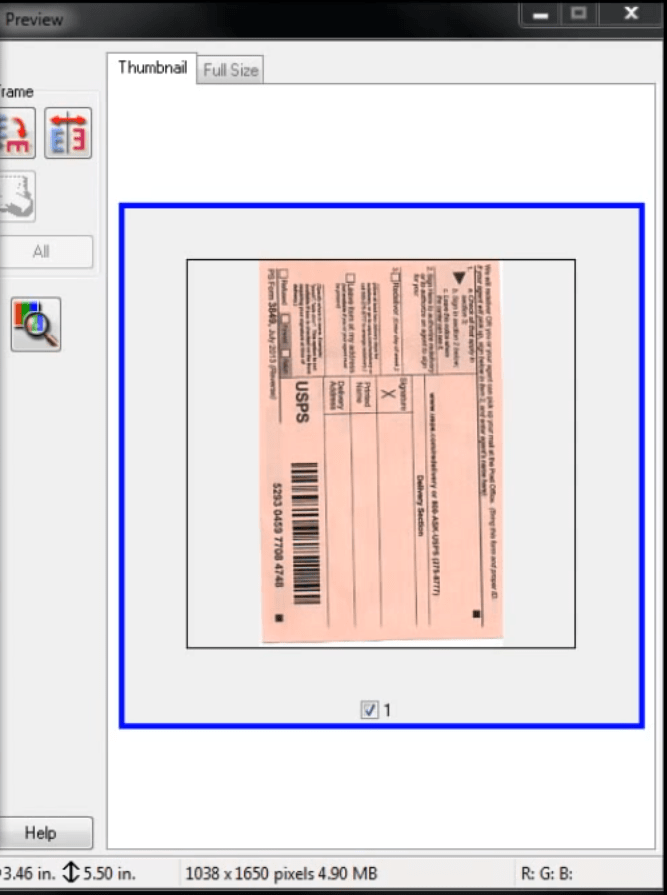
  5. Now start scanning your page and a window show you the scanned page image.
    image
  6. A pop-up window will ask you to either ‘Add page’, ‘Edit page’ or ‘Save File’. Since, this is the first page, you should choose the option ‘Add page’. Keep choosing “Add page” for all the images until you reach the last page.
    page
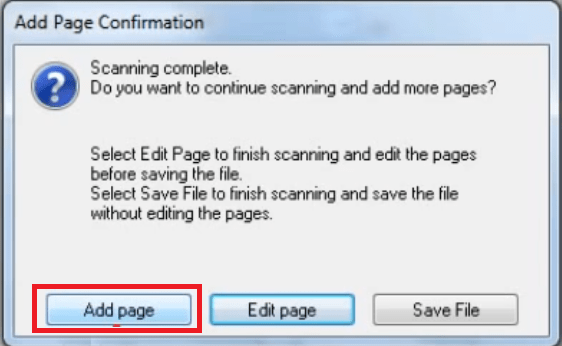
  7. For the last page, click on the ‘Save File’ option.
    file

That’s it, the Epson software will now collect all the scanned images and convert them into one PDF file. The PDF file will be saved in the default or your chosen destination folder.

- Advertisement -

Apart from scanning multiple page PDFs through Epson printers, your Epson scanner software can also edit scanned images, reorder, rotate or delete them. Study the software carefully and it can make your scanning experience easy and fun.

ByAmit
Hi, my name is Amit. I am a computer expert and love to fix printer related issues. I do share my experience on this website. If you like my efforts, please subscribe to my Youtube channel to get updated with the new tech things.
Leave a Comment

Leave a Reply Cancel reply

Your email address will not be published. Required fields are marked *

Useful Links

How to find your printer model number>
How to check my Windows OS version?
Is my Windows 32bit or 64bit?
Printer Diagnostic & Repair Tools
Printer Driver Request

Tech News

1) Apple has just released macOS 15: Sequoia (Glow) on September 18, 2024. The latest drivers are already updated on their download page, please check the download page to download the drivers for maOS 15.2. Read More. January 07, 2025

2) Finally, Microsoft released Windows 11 (24H2) on December 2024. The drivers on this website are being updated according to the latest version; this will be done shortly. You can start downloading the driver from its download page. January 06, 2025

Printer Driver Installation Tips

  • - Always run the printer setup from the CD that came with the printer or downloaded from the official website in order to avoid potential errors and incompatibility issues.
  • - Never plug the printer USB cable to computer during the installation process unless prompted by the installer.
  • - Use only the USB cable that came with the printer
  • - Remove all other previous versions of printer drivers to avoid driver conflicts.
  • - Carefully install the printer cartridges first and then proceed with adding paper to the tray.
  • - Always restart your computer for the driver installation process to be fully completed.

Disclaimer

We are an independent website and is not associated with any brand unless specified. All brand names, trademarks, images used on this website are for reference only, and they belongs to their respective owners. We disclaim any ownership, rights of such third-party products or copyright material unless otherwise specified. We also do not provide any kind of paid support. If you have any question feel free to contact us. Read our full disclaimer.

Printer USB Cable

You Might Also Like

EPSON WF-C5290 Series Driver
Epson

Epson WF-C5290 Series Driver Download (Printer & Scanner Driver)

April 12, 2024
Epson-LQ-2180-Printer
Epson

Epson LQ-2180 Driver Download (Dot Matrix Printer)

March 6, 2023
Epson Stylus NX125 Printer Snapshot
Epson

Epson Stylus NX125 Driver Download

January 31, 2022
Epson WorkForce WF-3640 Printer Image
Epson

Epson WorkForce WF-3640 Driver Download + Installation Guide

August 15, 2023
All rights reserved. Free Printer Driver Download (freeprinterdriverdownload.org)
  • Home
  • About us
  • Privacy Policy
  • Contact us
  • Disclaimer

Ask Question

Ask a question about your printer problem and we'll be happy to answer your query within 24 hours. It's completely FREE.
If this form is not working properly then please report it here.

adbanner
Welcome Back!

Sign in to your account

Username or Email Address
Password

Lost your password?