Whether you want to update / re-install the drivers of your Epson L385 printer driver or you want to wirelessly connect it with your Wi-Fi network, you should use the official Epson Website.
In the download section below, you’ll get latest driver download links for the Epson L385 printer for Windows 11/10/8/ 8.1/ 7/ Vista/ XP (32bit/64bit), Server 2000 to 2022, Linux, Ubuntu, and MAC 10.x, 11.x, 12.x OS. Apart from the drivers, we have also prepared an Epson L385 wireless installation guide just beneath the download section as well. Let’s start with downloading the drivers.
Steps to Download Epson L385 Driver
From our OS list, select your preferred operating system and use its download link to get your Epson L385 driver setup file.
Epson L385 Driver for Windows
Epson L385 Driver for Mac
Epson L385 Driver for Linux/Ubuntu
- Epson L385 driver for Linux, Ubuntu – Not Available
OR
Download the driver directly from the Epson L385 official website.
How to Install Epson L385 Driver
In this section, we have provided the installation guide for the full feature driver and the Epson basic driver. Follow the installation instructions in the guide related to your driver type.
1) Install Epson L385 Printer Using Full Feature Driver
Installation process for the full feature Epson L385 driver has been described in this installation guide. You can follow these installation steps for all the versions of the Windows operating system.
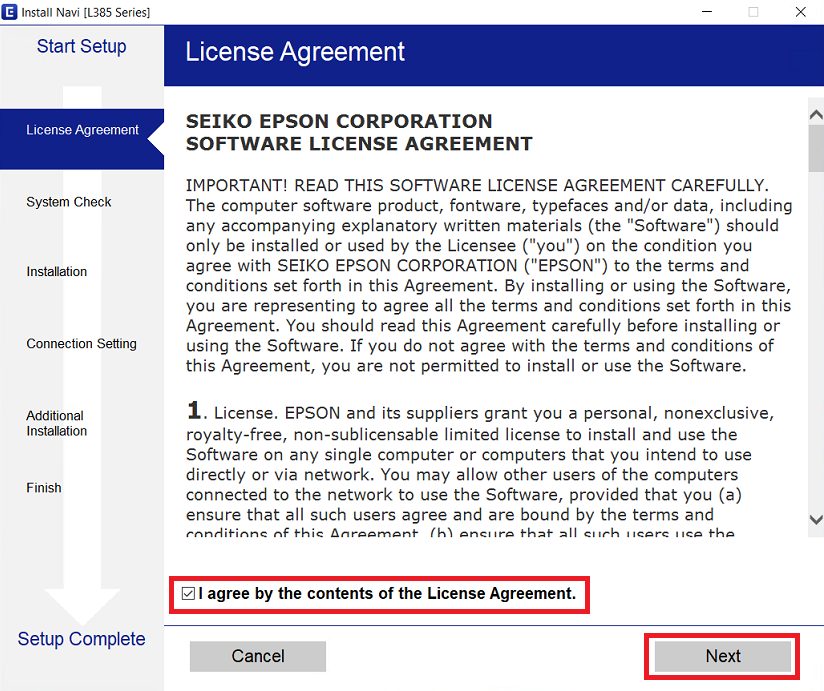
- Run the driver package driver file and in the License Agreement screen, choose the ‘I agree by the contents of the License Agreement’ option, then click on the ‘Next’ button.
- In the Software Installation Options screen, choose the ‘Product status monitoring and Automatic updates’ option, then click on the ‘Next’ button.

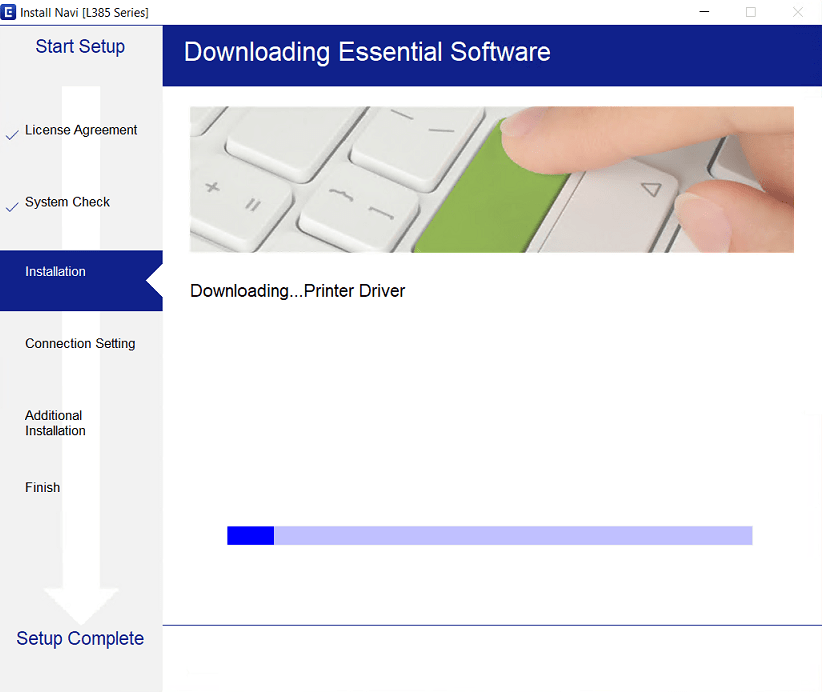
- Wait for the setup program to download the necessary drivers and software on your computer.
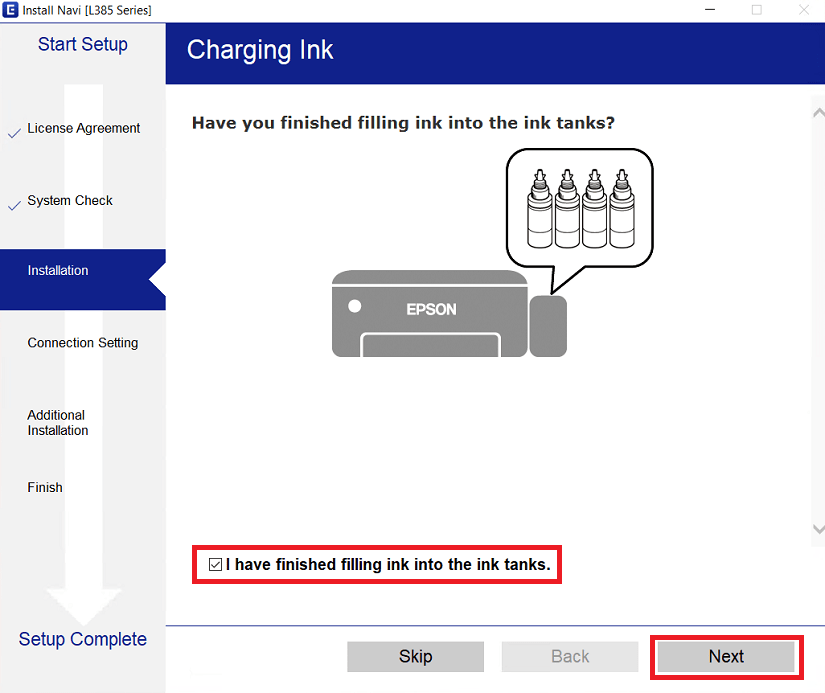
- Make sure that the ink is filled in the ink tanks, then choose the ‘I have finished filling ink into the ink tanks’ option and click on the ‘Next’ button.
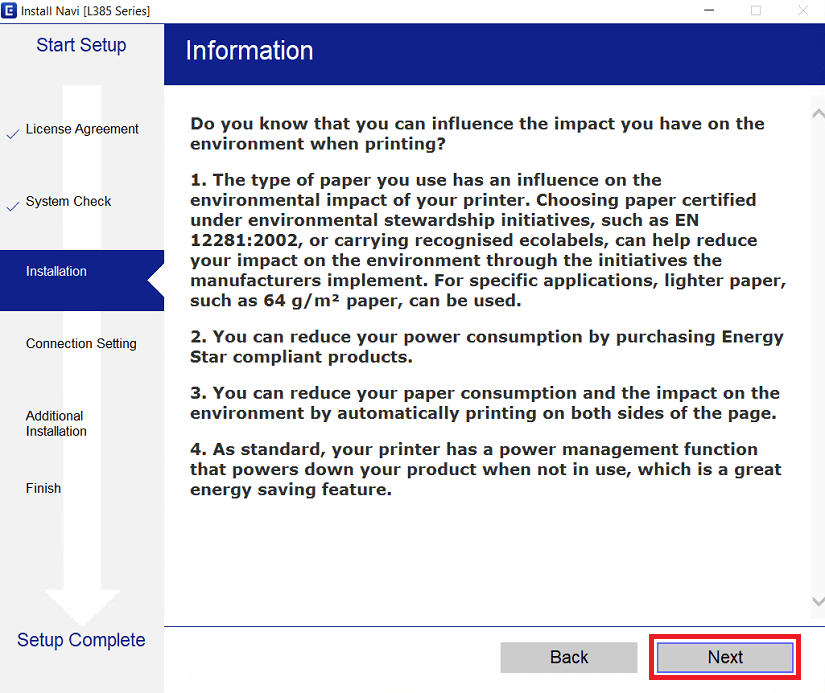
- Read the information displayed in the Information screen, then click on the ‘Next’ button.
- Wait for the setup program to perform the system check.

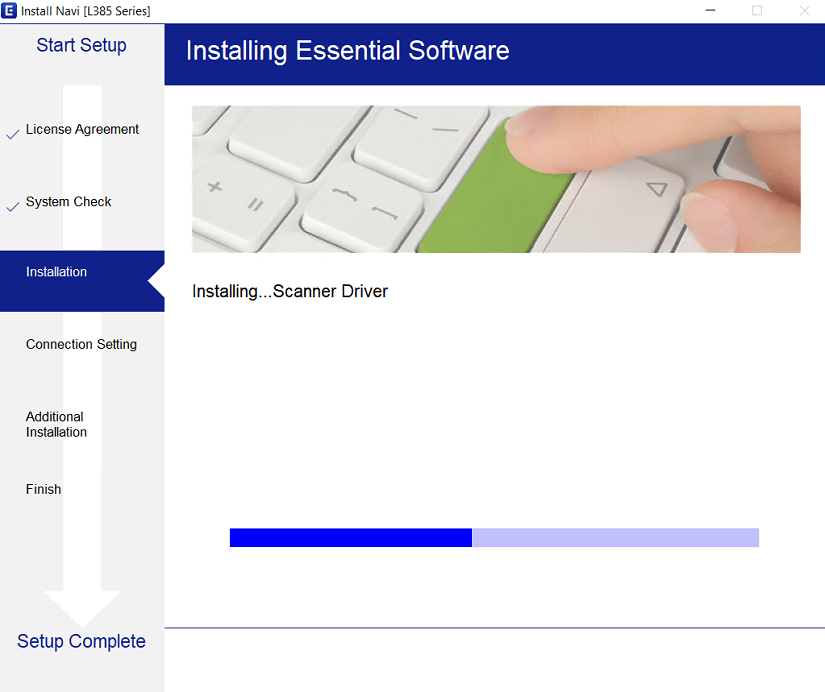
- Wait for the setup program to install the drivers and software on your computer.
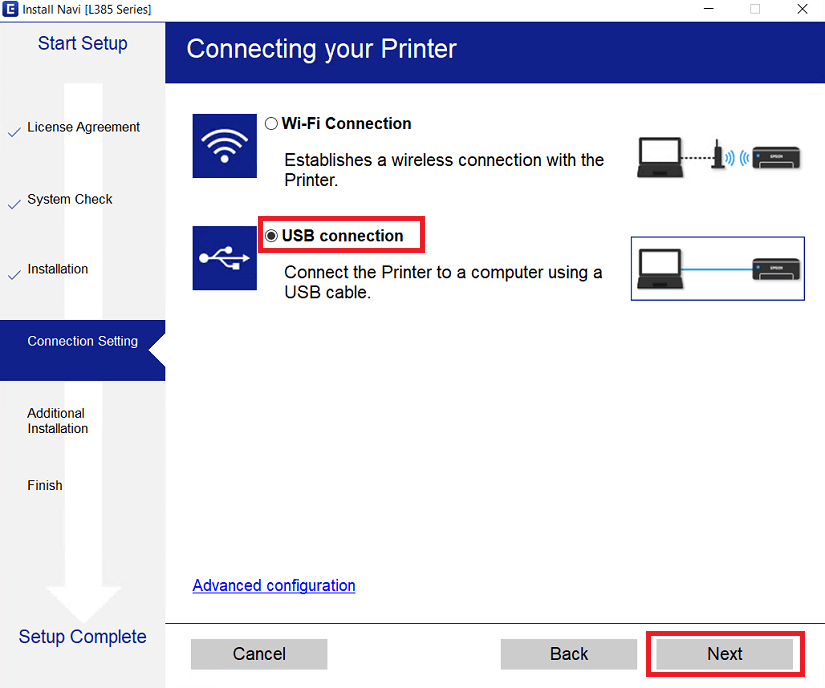
- In the Connecting your Printer screen, choose the ‘USB connection’ option, then click on the ‘Next’ button.
- Once the USB connection screen appears, you can then connect your Epson printer to your computer by using a USB cable. If you want to perform this step afterwards, then choose the ‘Connect your Printer later’ option and click on the ‘Next’ button.

- When you see the Setup Complete screen, then click on the ‘Finish’ button to close the setup program.
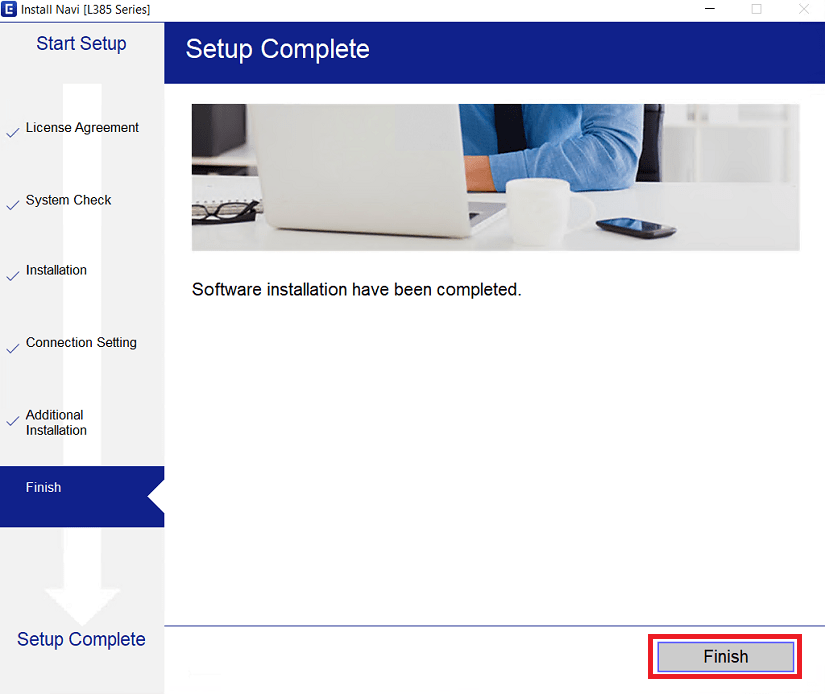
That’s it, installation of the Epson L385 driver package completed successfully on your computer. You can connect your Epson printer to your computer vis USB and its ready for use.
2) Install Epson L385 Printer Using Basic Driver
If you have decided to install this Epson printer using its Epson L385 basic driver, then read the installation guide given below. We have described in our guide the right method to install the Epson L385 INF driver on a Windows computer. How to install driver manually using basic driver (.INF driver)
How to Setup Epson L385 Printer through WiFi (Wireless)?
Once you have connected your Epson printer to your computer via USB cable, you can then connect this Epson printer to your wireless network as well. In this setup guide, we will explain the setup process to connect the Epson L385 printer with your Wi-Fi network. You can use the following steps for all versions of the Windows operating system.
Before you start the setup process, make sure that your wireless router is switched-on and ready to connect with other devices.
- Run the full feature driver file and in the License Agreement screen, choose the ‘I agree by the contents of the License Agreement’, then click on the ‘Next’ button.

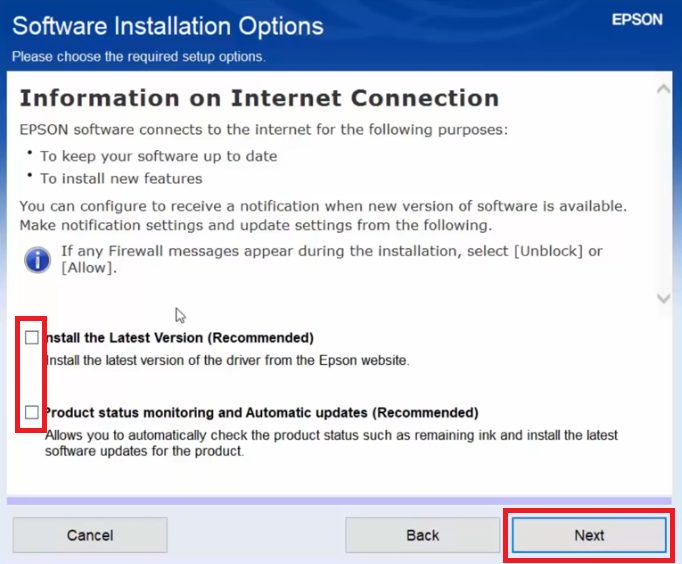
- Since, the drivers have been already installed, you should uncheck all the options, then click on the ‘Next’ button to proceed.
- Wait for the setup program to prepare your computer for the setup process.

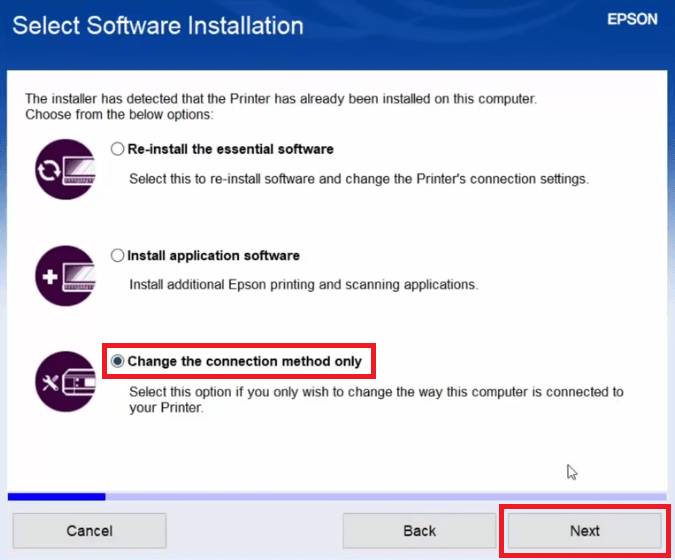
- In the Select Software Installation screen, choose the ‘Change the connection method only‘ option, then click on the ‘Next’ button. We have chosen this option because the Epson printer is already installed via USB port. If you want to choose any other option, then you can do that, the rest of the setup process will not be much different.
- In the Connecting your Printer screen, click on the ‘Wi-Fi Connection’ option, then click on the ‘Next’ button.

- Wait for the installation of the software to complete.

- In the Auto Wi-Fi Setup screen, click on the ‘Automatic Setup with USB Cable’ link.

- Now connect your Epson printer with your computer via USB cable.

- Wait for the setup program to initialize your printer.

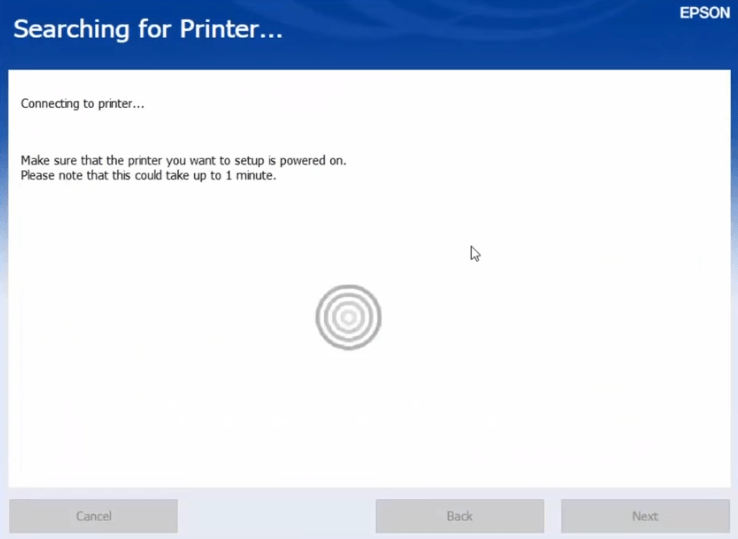
- Wait as the setup program searches for your printer and tries to connect with it.
- Select your ‘Epson L385’ printer model name in list and click on the ‘Next’ button.

- Make sure that the Wi-Fi network is the same to which your computer is connected, then click on the ‘Yes’ button.

- Enter the security key/password of your wireless network, then click on the ‘Next’ button.

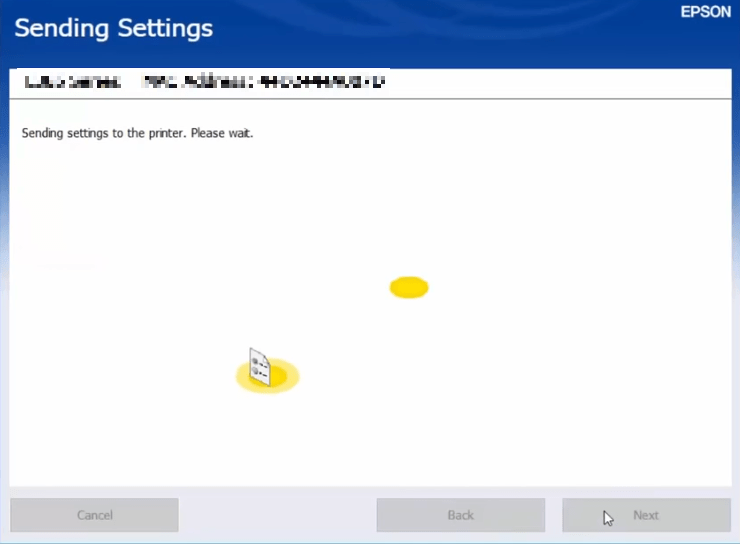
- Wait as the setup program sends settings to the printer.
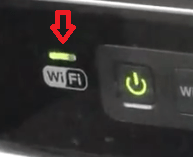
- The Wi-Fi led of your printer will start to blink in orange and green color.

- When the Wi-Fi led turns solid green, then the connection has been established.
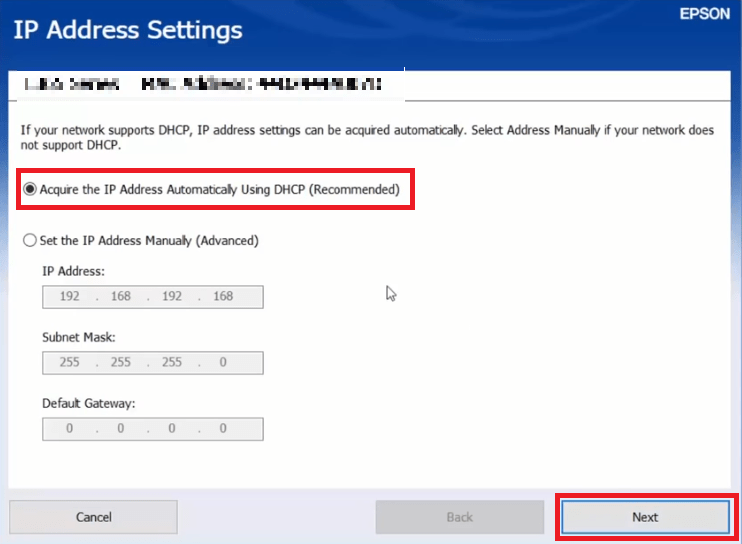
- In the IP Address Settings screen, choose the ‘Acquire the IP Address Automatically Using DHCP’ option, then click on the ‘Next’ button.
- Wait for the setup program to complete the wireless setup.

- When you see the Setup Complete screen, then click on the ‘Next’ button.

- Wait for the setup program to proceed.

- If you want you can print a test page, otherwise, click on the ‘Next’ button.

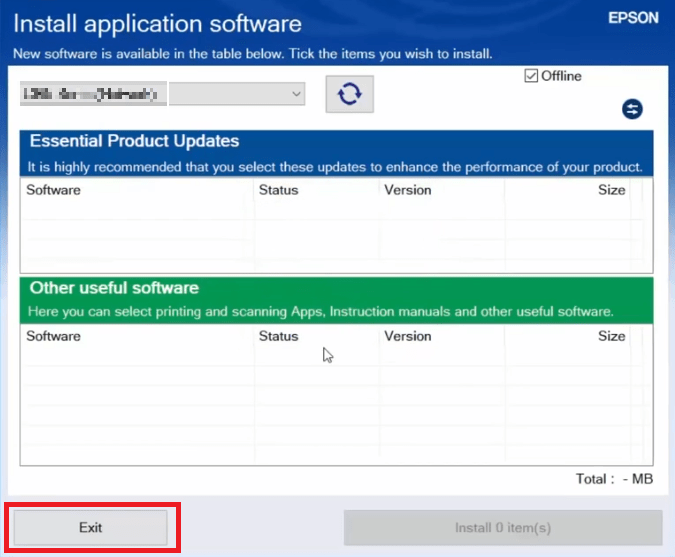
- Click on the ‘Exit’ button to close the setup program.
That’s it, you have successfully setup your Epson L385 printer with your wireless network.
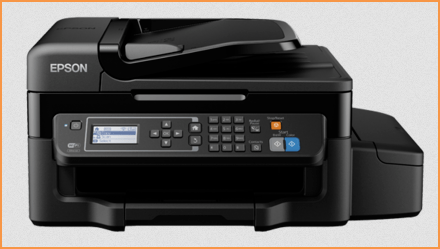
Epson L385 Features
The Epson L385 all-in-one printer has an integrated ink system so that you can print a high volume of pages without compromising on print quality, while availing low printing costs. This inkjet printer is easy to setup and many of its basic functions, like scanning and copying, can be quickly performed by using the buttons on the printer control panel. The Epson printer supports USB and Wireless connectivity options.
Ink Cartridge Details
The ink for this Epson inkjet printer is available in Black (T6641), Cyan (T6642), Magenta (T6643) and Yellow (T6644) ink bottles. You will get 70 ml of ink in each ink bottle.