Downloading and installing the Brother printer driver on any operating system, such as Windows, Mac or Linux, can seem to be tough at first but believe me it is easy. However, if you know the right method of installing the brother printer driver, then the whole process will seem pretty simple even to a novice computer user. Therefore, I have prepared this guide, which has all the information required to properly download and install the Brother printer driver in Windows / Linux / Mac operating systems. Let’s start the installation process:
Find the Brother printer driver here:
- Unbox and Setup Your Printer
- Unbox the Brother printer:
- Setup your Brother printer:
- Types of Brother Printer Driver Installers
- Download the Brother Printer Drivers
- Install Brother Printer Driver in Windows
- 1) Install full feature Brother printer drivers in Windows
- 2) Install basic Brother printer drivers (inf drivers) in Windows
- Install Brother Printer Driver in Mac OS
- Install Brother Printer Driver in Linux
- Final Thoughts

Unbox and Setup Your Printer
Before starting the installation of your Brother printer, you need to properly unbox and setup your printer, otherwise, during the printer installation process you will encounter problems, but you won’t be able to identify whether that problem is caused due to hardware or software issues.
Unbox the Brother printer:
First thing you need to check while unboxing your printer are its components. Other than the printer you will get multiple components, which may vary depending upon your country/region, but they will include:
- Introductory ink/toner cartridges, for the color printers there will be Black, Magenta, Yellow and Cyan cartridges, and for the monochrome printers there will be only Black cartridge.
- Power cord
- Installation CD
- Quick setup guide, Basic user’s guide, Product safety guide
- Telephone line cord (if your printer supports Fax function)
Arrange these items carefully as you will need them while setting-up and installing your printer.
Setup your Brother printer:
Now that you have unpacked your Brother printer, you need to remove the protective tape and film which is covering the printer and its LCD screen. Then proceed with the steps given below, as an example, I will describe the steps for a Brother inkjet printer, but you can follow these steps, with necessary variations, for laser printers as well:
Step 1: Load plain paper
- Pull the paper tray completely out of your printer.

- Open the cover of the output paper tray.
- Make sure that paper is properly fanned and not sticky, then load it in the tray. Finally, adjust the paper guides.

- Close the output paper tray cover, then slowly push the tray completely into the printer.
Step 2: Connect power cord
- Connect the power cord to the printer and it will power on automatically once you switch on the power.

Step 3: Connect telephone cord (if supported)
- If your printer supports Fax function, then connect the telephone line cord in the socket marked, LINE.

Step 4: Install the ink/toner cartridges
- Open the ink/toner cartridge cover, then remove the orange protective part from the printer.

- Follow the on-screen instructions to install the ink cartridges, and let your printer prepare the ink tube system for printing.

Now that you have setup your printer, its time to install it on your computer. Following sections will guide you in successfully completing the printer installation.
Types of Brother Printer Driver Installers
Printer driver is a software that translates data from the computer format to the format that that is understandable by the printer. Usually, this format is page description language (PDL). Broadly, there are two types of printer driver installers which you will find on the CD ROM supplied with your printer or on the support page of your Brother printer.
- Drivers with installer: These types of drivers install automatically on your computer as they come with an installer, all you need to do is select your preferences and the installer will do the rest. Usually, these drivers are called full feature drivers, because you get the option to install printer drivers with other printer software and utilities.
- Drivers without installer: When you install the drivers which don’t come with an installer, then you have to follow the manual installation method. Usually, these types of drivers are available for old printer models. Also, in manual installation you can only install basic printer drivers on your computer, without any printer software and utilities.
Now that you know the two category of printer driver installers, its time to know from where you can get these printer drivers, and then how to properly install them on your computer.
Download the Brother Printer Drivers
You can always find the drivers for your Brother printer in the CD ROM supplied with your printer, but with the passage of time those drivers become outdated. Therefore, its advised that you should always download the latest version drivers of your printer from the Brother website before you start the installation of your Brother printer.
Find the Brother printer driver here:
Follow the instructions given below to download the latest version drivers directly from the Brother’s official website:
- You can visit the Brother Support & Download page or use the search box provided in this page. The subsequent steps for both will be the same.
- Type the model’s name of your printer in the search box, then click the ‘Search’ button, or you can search your printer by category on the Bother website.

- In the Downloads page, select your OS family, in my case, I selected ‘Windows’, then select your OS version, I selected ‘Windows 10 (64-bit)’. Finally, click on the ‘OK’ button. If you have any doubts regarding your OS version, then you can use the link ‘How to identify your Operating System’ to clear your doubts.

- Now, you will see the list of drivers, firmware, utilities and tools which are suitable for your printer. If you want, then you can change the OS version and language. Check the details of the available drivers; version, release date, file size, etc. After selecting your preferred driver, click on its link. I selected the ‘Full Driver & Software Package’.

- Again, verify complete details of the printer driver, then click on the ‘Agree to the EULA and Download’ button.

That’s it, the driver download will start and you can find the newly downloaded driver file in the downloads folder. Now all that’s left, is to install the printer driver on your computer, which I will explain in the next section.
Install Brother Printer Driver in Windows
When it comes to installing your Brother printer drivers on your Windows computer, then you have two options depending upon your driver type. You either have the full feature Brother printer drivers, or you want to install the Basic/INF printer driver. Here, I will describe the installation method for both these driver types. Read and follow the instructions of the guide which is suitable for your driver type to properly install the Brother printer drivers on your computer.
1) Install full feature Brother printer drivers in Windows
In this installation guide, I will explain the installation process for the full feature Brother printer driver on a Windows computer. The installation steps given below can be followed for all the versions of the Windows operating system. I will explain the generic installation method, you may have to make some variations based on your Brother printer model.
- Run the full feature driver file and wait for its files to unpack on your computer.

- In the Select Language screen, select the language you prefer, then click on the ‘Next’ button.

- In the License Agreement screen, select the ‘I accept this license agreement’ option, then click on the ‘Next’ button.

- Select the connection method that you prefer for connecting your printer with your computer. I have selected the ‘USB’ method, then click on the ‘Next’ button.

- Connect your Brother printer with your computer by using a USB cable and make sure your printer is switched on, then click on the ‘Next’ button.

- In the Select Machine screen, verify that the printer model displayed is of your Brother printer, select the ‘Standard’ installation type, then click on the ‘Next’ button.

- Wait for the installer program to begin the driver installation process.

- If additional software is required to be downloaded, then installer program will do so, wait for the download process to complete.

- Wait for the installer program to complete the installation process.

- In the Additional Software screen, if you want to install the PaperPort program on your computer, then click on the ‘Install’ button, otherwise, you can skip this step as you can always install the PaperPort program later. Finally, click on the ‘Next’ button.

- In the Additional Options screen, if you want to participate in the Brother Product Research and Support Program, then select the checkbox, otherwise, leave it unchecked. Finally, click on the ‘Next’ button.

- In the Installation Complete screen, click on the ‘Finish’ button to close the driver installer program.

That’s it, you have successfully completed the installation of the Brother printer driver package on your computer.
2) Install basic Brother printer drivers (inf drivers) in Windows
When it comes to installing the basic/INF drivers of your Brother printer, then it can be a bit tricky for some users because they will have to perform a lot of steps manually. Therefore, in this guide, I will describe the installation steps for the Brother basic printer drivers, which you can follow for all the versions of Windows operating system.
- Click on the ‘Start’ button, then select the ‘Settings’ option.

- In the Settings page, click on the ‘Devices’ option.

- In the Devices page, select the ‘Printers & scanners’ option in the left pane, then click on the ‘Add a printer or scanner’ option.

- Wait for the ‘The printer that I want isn’t listed’ link to appear, then click on it.

- In the Add Printer wizard, select the ‘Add a local printer or network printer with manual settings’ option, then click on the ‘Next’ button.

- Click to expand the existing port list, then select the ‘USB’ port from the list. Finally, click on the ‘Next’ button.

- Click on the ‘Have Disk’ button.

- Click on the ‘Browse’ button.

- In the Browse window, go to the folder where basic printer driver files were extracted, then select the appropriate inf file. Finally, click on the ‘Open’ button.

- Verify that driver location is correct, then click on the ‘OK’ button.

- In the list of printers, select the model name of your Brother printer, then click on the ‘Next’ button.

- If you want you can change the display name of your Brother printer, then you can type your preferred printer name. Finally, click on the ‘Next’ button.

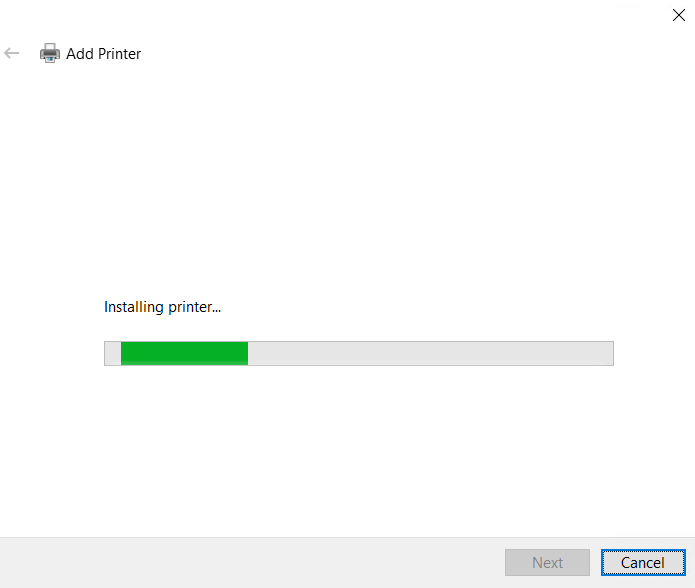
- Wait for the installation of the printer drivers to complete.
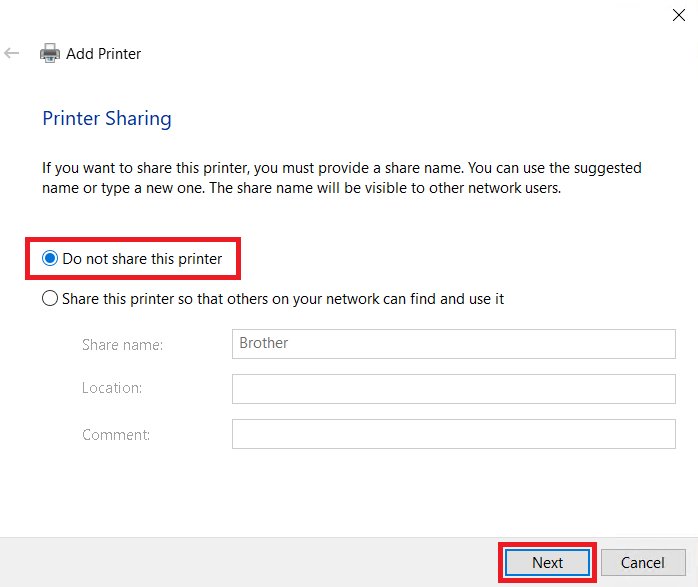
- Select the ‘Do not share this printer’ option, then click on the ‘Next’ button. If you want to share this printer over the network, then select the ‘Share this printer’ option and provide the necessary details.
- When you see the message that Brother printer has been added to your computer, then click on the ‘Finish’ button.

That’s it, you have successfully installed the Brother printer INF driver on your computer.
Install Brother Printer Driver in Mac OS
When installing the Brother printer on your Mac computer you have the option to use in-built drivers or the AirPrint feature of Mac. However, if you want to install the drivers which you have downloaded from the Brother website, then I will describe the complete installation process below. You can use these installation steps for all the versions of the MacOS.
- Run the driver setup file downloaded from the Brother website and double click on the ‘Start Here’ icon.

- Click on the ‘Open’ button to proceed.

- In the Usage Information screen, select the ‘Send Information’ option, then click on the ‘Next’ button.

- In the Connection Type screen, select your preferred connection option, I selected the ‘USB’ connection option, then click on the ‘Next’ button.

- Make sure your Brother printer is connected with your computer via USB cable and switched on, then wait for the installer program to detect your printer. Select your Brother printer from the list, then click on the ‘Next’ button.

- In the Introduction screen, click on the ‘Continue’ button.

- Read the information displayed on the screen, then click on the ‘Continue’ button.

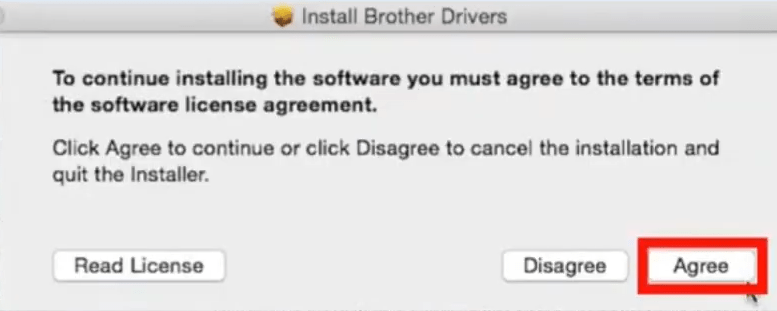
- Accept the license agreement by clicking on the ‘Agree’ button.
- Click on the ‘Install’ button to begin the printer driver installation process.

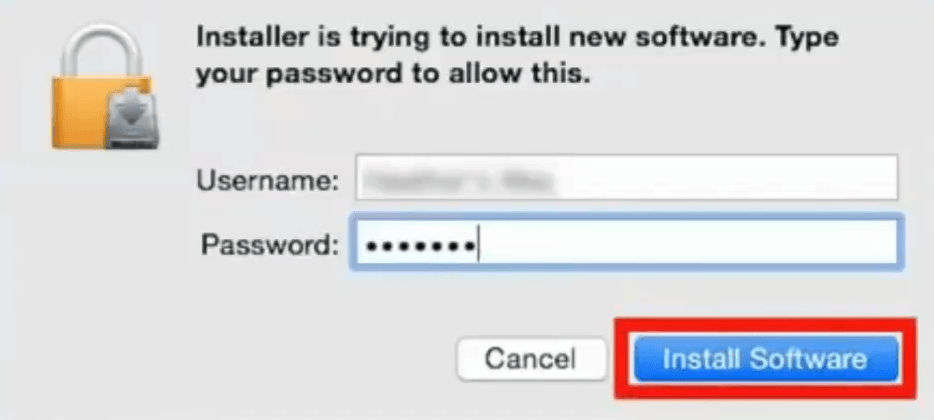
- If you are prompted, then enter your Mac username and password, then click on the ‘Install Software’ button.
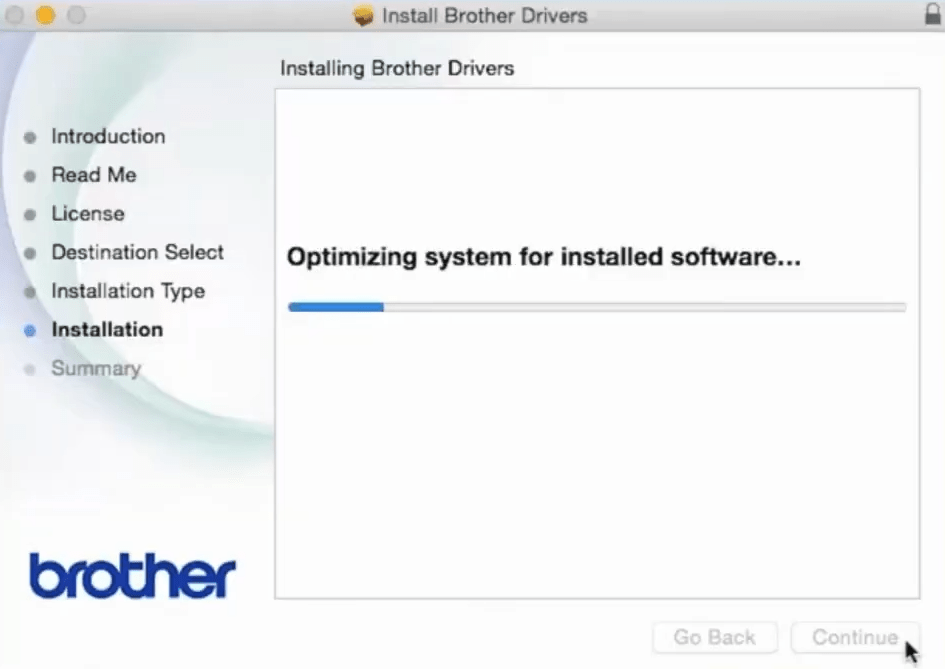
- Wait for the installation of the drivers to complete.
- When you see the message that installation was successful, then click on the ‘Close’ button.

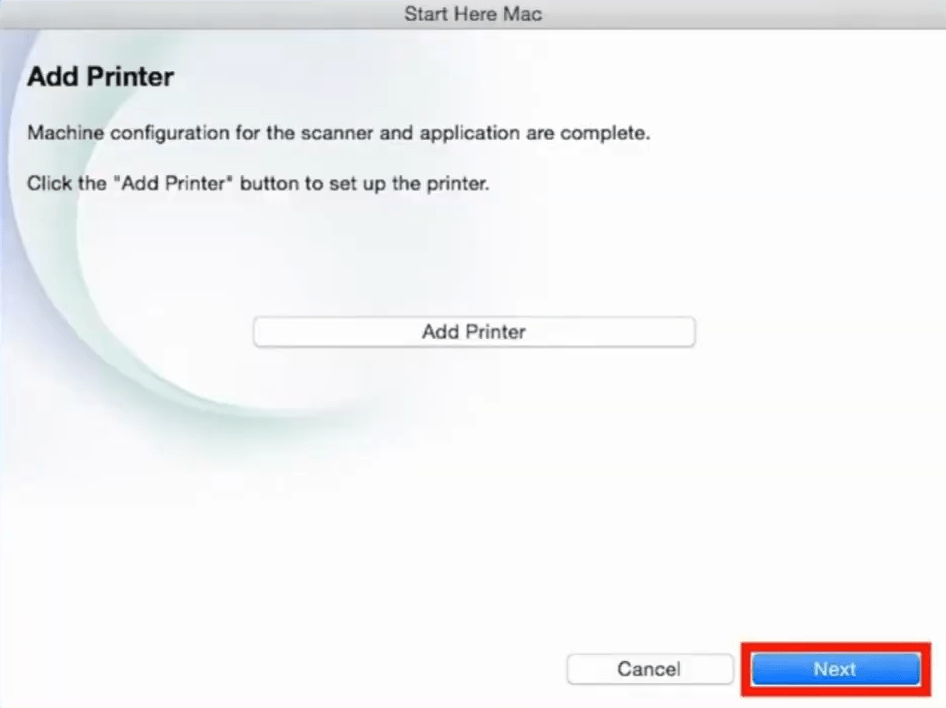
- In the Add Printer screen, click on the ‘Add Printer’ button.

- Select the your Brother printer in the printer list, then in the Use field, select the Brother series driver which you just now installed. Finally, click on the ‘Add’ button.

- Click on the ‘Next’ button.
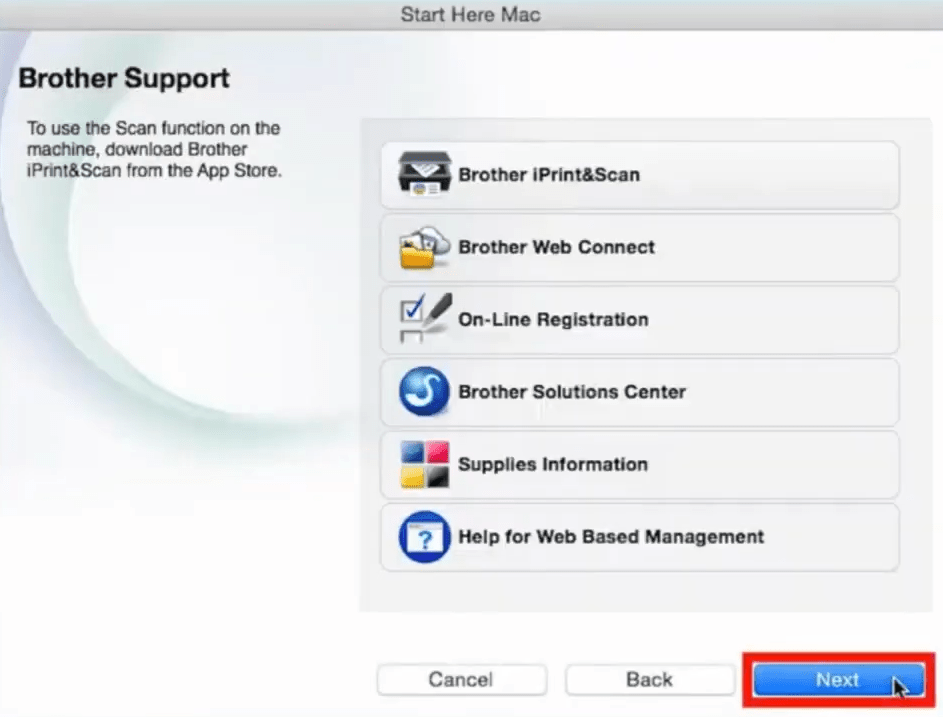
- When you are prompted to download the Brother iPrint&Scan application, then click on the ‘Download from App Store’ button.

- Click on the ‘Next’ button.

- In the Brother Support screen, click on the ‘Next’ button.
- When you see the setup complete message, then click on the ‘Close’ button to close the installer program.

That’s it, you have successfully installed the Brother printer drivers on your Mac operating system.
Install Brother Printer Driver in Linux
In this guide, you will learn how to install Brother printer drivers in Linux operating system. As an example, I will describe the installation process in Ubuntu 16.04 OS version, but you can follow the same process for other Linux OS versions as well.
- Right click the empty space and select the ‘Open in Terminal’ option to open the terminal window.

- Switch to the root user and type your password. Type command ‘su root’, then press ‘Enter’. Finally, type your password and press ‘Enter’.

- Go to the directory where the printer driver setup file has been downloaded, usually, it’s the downloads folder. Type command ‘/home/<username>/<download folder name>’, in my case its, ‘cd /home/qoppa/downloads’. Finally, press the ‘Enter’ key.

- Now, extract the contents of the downloaded driver setup file. Type command ‘gunzip linux-brprinter-<driver setup filename>’, in my case its, ‘gunzip linux-brprinter-installer-2.1.1-1.gz’, then press the ‘Enter’ key.

- Now we need to run the driver installation tool. Type command ‘bash linux-brprinter-installer-<Brother printer machine name>’, in my case its, ‘bash linux-brprinter-installer-2.1.1-1 MFC-L2700DW’, then press the ‘Enter’ key. When asked for permission to proceed with the installation, press the ‘Y’ key to proceed.

- Now installation of the printer driver will start, just follow the installation screen prompts to complete the driver installation. When you see the message ‘Will you specify the DeviceURI?’, then press the ‘N’ key, that’s because we are connecting the printer via USB cable. If you want to connect your printer via Ethernet or Wireless connection method, then you will have to provide the Device URI.

- When the installation has completed you will be asked to print a test page. Make sure your printer is connected with your computer via USB cable and switched on, then press the ‘Y’ key to print a test page.
That’s it, you have successfully installed your Brother printer driver on Linux operating system.
Final Thoughts
It’s not difficult or complicated to download and install Brother printer driver in Windows / Linux / Mac OS. All you need to do is to follow the instructions mentioned above in their correct order and you shall have no problem in downloading the latest Brother printer drivers of your printer model, and then installing them properly on your computer.