
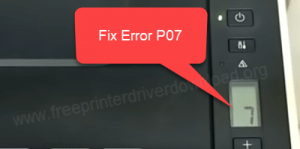
After Canon G2010 has printed a lot of pages, its users tend to encounter the error P07 and power and error light is flashing (blinking), which stops them from printing any new documents. This error is usually characterized by its users as a hardware related issue which requires the assistance of a service engineer, but this error can be easily fixed at home if you follow the right steps. Therefore, in this guide, we will describe a quick and easy solution of how to fix Canon G2010 error P07.
What Causes Canon G2010 Error P07?
Most users encounter error P07 on Canon G2010 printer after they have printed a lot of pages with their printer. This error is directly related to the flow of ink on their printer. The G2010 printer from Canon has integrated ink tanks, which makes the flow of ink highly abundant. Therefore, after printing a high volume of pages the ink in this printer starts to overflow, but the printer is unable to rectify this problem by itself, thus, it shows the error P07 and stops printing.
When you see P07 error code on your Canon printer, then you should know that it’s due to ink overflow issues. However, there is nothing to worry because your printer already has a system which you can use to clean the excess ink. Since, your printer can’t execute that system by itself, you will have to operate that system manually and once you do that properly, then you will be able to solve the Canon G2010 error P07. The clean-up process is easy to operate and anyone can do it at their home. We will describe the complete process below.
How to Fix Canon G2010 Error P07
Now that you know what caused error P07 on your Canon printer, it’s time to tell you the exact steps you need to follow to fix this problem. Before starting to implement the solution you must read all the steps carefully. This is because you will have to perform the same steps in succession with minor alterations. If you are not careful, then you will make some mistakes and eventually you won’t be able to fix this error on your Canon printer.
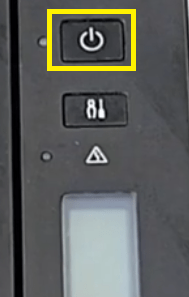
- Turn the printer off – Press the ‘Power’ button on the printer control panel to turn off the printer and then follow the following instructions. If your printer is already turned off then you can skip this step.
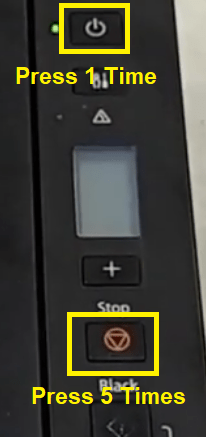
- Press and hold the ‘Power’ button for 5 seconds, then press the ‘Stop’ button five times while you are holding the ‘Power’ button.
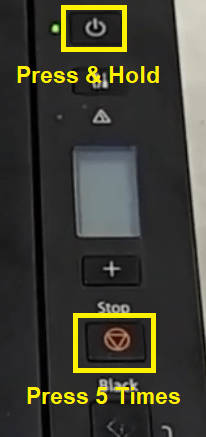
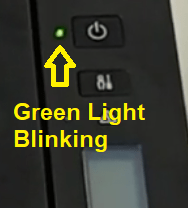
- The ‘Green’ power led will start blinking, wait for it to stop blinking before you move to the next step.
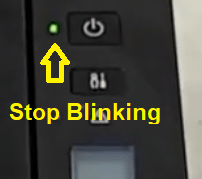
- When the green power led stops blinking its a sign that your printer has entered into repair mode. Now, all the commands you will give to your printer by pressing its control panel buttons will activate the automatic repair mechanism of your Canon Printer. Therefore, the steps given below needs to be carried our carefully and exactly as they have been described because you are working directly with the internal repair mechanism on your Canon printer.
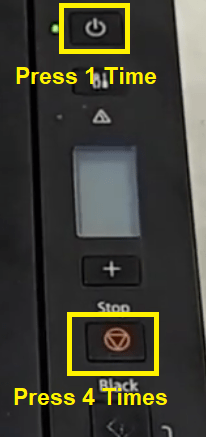
- Press the ‘Stop’ button four times and after that press the ‘Power’ button once.
- Now, press the ‘Stop’ button three times and after that press the ‘Power’ button once.

- Again, press the ‘Stop’ button five times and after that press the ‘Power’ button once.
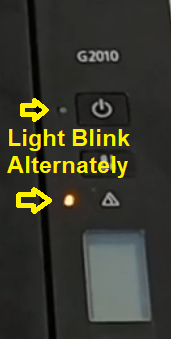
- ‘Green’ and ‘Red’ led lights will start to blink alternately. This is your printer performing the clean-up process as it will start the maintenance of the ink-flow mechanism. Wait for the process to finish and your printer will automatically stop making noises.
- That’s it, your printer has cleaned itself. Press the ‘Power’ button to switch-off the printer and wait for a few seconds. Doing this will bring your printer out of the repair mode.
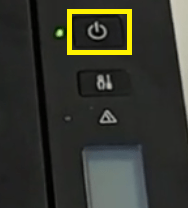
- Press the ‘Power’ button on your printer control panel to switch-on your printer.
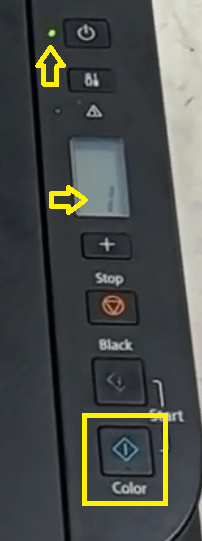
- Now, you will see a ‘Drop’ sign on the printer display screen. This drop sign is a confirmation that your printer is encountering ink overflow problem. The number ‘0’ signifies that the printer has zero documents on the print queue.

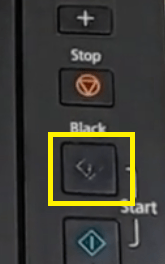
- Press the ‘Black’ button near the Start to give the print command to your printer.
- ‘Green’ led of Power button will start to blink. Again your printer is performing the cleaning which is required for the printing to begin. Wait for the process to complete.
- When the Green led stops blinking, you will see that display screen is showing ‘1’ number, which is a sign that your printer has one print in the queue. Now, press the ‘Color’ button near start to print a page.
- If your printer prints the page normally, then the error P07 has been fixed. However, if the printer prints a ‘Blank’ page, then don’t worry and follow the steps given below. Switch-off the printer by pressing the ‘Power’ button on the control panel.
- Switch-on the printer by pressing the ‘Power’ button.
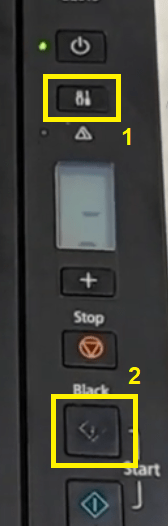
- After printer reboots, press the ‘Test page’ button, then the ‘Black’ button to give the print command.
- Now your printer will print the test page, which is a sign that your printer has started working normally.
That’s it, you have successfully fixed the Canon G2010 error P07 and your printer is ready to print, scan and copy documents just like before.
We have clearly explained in this guide how to fix Canon G2010 error P07. Our guide is really simple to understand and easy to execute, which means even a novice user can fix this error on their Canon printer. However, since some of the steps are repetitive you need to be careful while executing them so that the order of steps don’t get altered and you get proper results.


Thank you very much! I have seen many descriptions of this problem, they are very similar, but they were not written carefully. Your description solved the problem 10 out of 10
Thank you very much!
You’re welcome!! Glad to know to know that it worked for you.
Very nice, problem solved thanks a lot
You’re most welcome!! Glad to know that it worked out for you.
Superlative indeed.
Thanks a bunch. It really worked
HOW TO WORK SAME PROBLEM ON TS3340 CANON PRINTER
Reset your printer like this: https://www.youtube.com/watch?v=fP72_d-fArI
This should fix your P07 error.
Thanks alot problem solved perfect.
God bless you
You’re most welcome! Glad to know that it worked for you. Also, thanks for sharing your experience here.
Very Good Report. Thank you very much. lots of Thanks dear. go ahead.
Our printer is now okay.
Thank you!
Glad it worked for you. Thanks for sharing your experience here.
After I have done this my printer went dead
No sir, it did not work. please help me sir.
What is the model number of your printer?
Hello, I have this problem. But this solution didn’t work all the way from step 2 where you should hold the power button and press stop 5 times. Everytime I do that, this damn printer turned off instead. How could this happen and what should I do to fix this? Thanks. (I use Canon PIXMA G3010)
Check out this video tutorial that made on G3010 printer and let me know result.
It worked! Thank you for your help.
It’s great! Glad to know it helped you out.
This has solved the problem exactly as you said. Thankyou very very much. So easy to follow your directions.
Many thanks. Problem solved
This hack saved me ! I really thought thats my printer has a serious problem and had already searched for a service point but then i tried out this here and finally solved my problem. Great ! Thank you so much 🙂
You’re most welcome!! Glad it helped. Have a great day!!
terima kasih min caranya,sangat membantu
Does this work on Canon MP287 P07 problem? if not can you help please ….
Yes, it should work, please try it and let me know.
I m testing now but stucked at step 4 – because the green power led does not stop blinking (does not enter repair mode). Tried second time still the same. The screen also showing blinking P07.
Maybe the M287 will take different steps to fix this issue. Try power draining your printer to fix the issue. Here’s how to power drain: https://www.freeprinterdriverdownload.org/power-drain-printer/
Thank u so much.. it works and helps a lot.. problem resolved.
A big Thanks from here, it work and in a perfect Condition, am even making money out from this. thanks once more.
My printer Canon G 2010 Service following step follow but not solve problem….firstly my G2010 printer are not stable in the service Mode problem in step 1 please help me ……Thanks
Uhm this pattern is not working on TS3440
How can I fix it
After step 1, green light normal, then blackout, when tried to put it on again, it wont start. please help. how to on my printer again..
Try to power drain your printer. Here’s how: https://www.freeprinterdriverdownload.org/power-drain-printer/
Thanks a lot for solving this problem for me. But my printer was displaying po8 error signal and I tried solving but the yellow and blue ink refused to come on the printhead when running a nozzle check. Please help me.
PROBLEM SOLVED, THANK YOU VERY MUCH FOR YOUR HELP
not solved
its woking nice
thank u
While performing steps, printer totally off. Power on/off does not work
Problem solved, thanks a lot
Thank you my problem solved.
Great steps, it worked!!!!
Problem Solving 100% Grateful article
Wow nice guide line , solved problem by my self easily. Thank you very very much….
Thank you so much for your feedback!! I am glad that it worked for you.
Wow, what a great talk-down dude. Appreciate it very much. May God ease your problem as you ease mine. Thank you very much.
first step is wrong switch off the printer then follow all steps.
Yes, there was a typo error. Thanks for highlighting the bug.
Thank you very much, the problem is solved
Problem Solved!
Thank you 🙂
You’re most welcome!! Glad to know it worked.
thank you for your help… more blessing
thanks a lot problem solved
problem solved but there a new problem after i click the color button, P08 error occur
thanks
thanks so much problem solved.
Thanks for sharing your experience here.
problem is still pending
hello
step 7
blincking dont stop
problem not solved
thanks