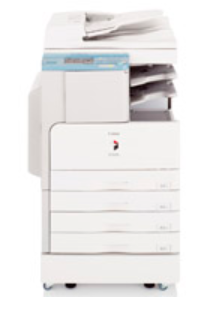
Calling the Canon ImageRunner IR 2025 just a printer is not correct, because it does much more than printing. It can print, copy, scan, scan to email, ADF and auto duplex features. That’s why it is better to call a copier instead of just a printer. This copier can be connected to your local network, so that you can easily print wirelessly from your laptop, phone and other wireless enabled devices.
In this article, I am going to share the complete information about how to set up this copier on your local network. To set up this printer, you will require its latest version driver first. I have given the driver download link below, please check it out. After that, don’t forget to read the step-by-step guide on how to install it, which is also given beneath the download section.
Download Canon ImageRunner IR 2025 Printer Driver
To download the driver, you just need to determine the operating system version of your computer and click on the below given download link accordingly.
Driver for Image Runner IR 2025 Pribter
Type: Full feature driver Operating System: Windows 11, 10, 8, 8.1, 7, Vista, XP, Server 2000 to 2025 File Size: 216 MB Version: 2.3 Download DriverOR
Alternatively, you may download the same drivers from Canon’s official website.
How to Install Canon ImageRunner IR 2025 / 2025W Printer Driver
In order to install this printer properly on your computer, you just have to follow the following instructions. I have shared a step-by-step guide. I had prepared it when I had installed this printer on my computer. Please follow the below given steps.
Installation Steps:
Step 1: Download the “canon-ir-2025-driver-windows.zip” driver file from the download section according to the operating system version of your computer.
Step 2: After download, unzip the driver’s zip file.
Step 3: Open the extracted folder and then double-click on “UFRIILT_Driver_V3105_W64_00.exe” file to execute it. This will also unzipping the driver files, so please let it be done.
Step 4: After unzipping, it will auto start the setup.exe file. If it doesn’t happen, then the installer must have created a folder in the same location, please open that folder and execute the setup.exe manually.
Step 5: After that, the installation wizard has been started, there you have to select the preferred language and then click on Next.
Step 6: Click on Yes.
Step 7: Select the preferred connection type (Network, Wireless or USB) and then click on Next.
Step 8: Then click on Yes.
Step 9: Now, connect the printer’s USB cable to the computer and then click on Next.
Step 10: This screen will detect your the printer connection and then you will have to click on Next and then finally click on Finish to complete the installation process.
So, this is how you can install this Canon iR2025 printer on your computer. Please share your installation experience in the comments section below.