The Canon Selphy CP1300 printer is a portable printer and it is really easy to carry. It has WiFi connectivity feature so it is also easy to connect it from anywhere wireless.
While installing this printer on your computer, make sure that you are using the latest printer driver. You may download the latest driver from its official website, there you’ll get the latest driver all the time. Anyhow, if the official is not working then you may download the same drivers from the download section given below.
- Steps to Download Canon Selphy CP1300 Driver
- Canon Selphy CP1300 Driver for Windows
- Driver for Mac
- Driver for Linux/Ubuntu
- How to Install Canon Selphy CP1300 Driver
- 1) Install Canon Selphy CP1300 Printer Using Full Feature Driver
- 2) Install Canon Selphy CP1300 Printer Using Basic Driver
- Canon Selphy CP1300 Features
- Ink Cartridge Details
In the download section, you will find the Canon Selphy CP1300 driver download links for Windows 11, 10, 8, 8.1, 7, Vista, XP (32bit / 64bit), Server 2000 to 2022, Linux, Ubuntu, and Mac 10.x, 11.x, 12.x, 13.x Ventura operating systems.
Also, go through the installation instructions in the installation section to properly install your Canon printer driver.
Steps to Download Canon Selphy CP1300 Driver
Step 1: Select your preferred operating system.
Step 2: Click on the download link to download your Canon Selphy CP1300 driver setup file.
Canon Selphy CP1300 Driver for Windows
Driver for Mac
Driver for Linux/Ubuntu
OR
Download the driver directly from the Canon Selphy CP1300 official website.
How to Install Canon Selphy CP1300 Driver
I have shared below the detailed installation guide for the full feature driver and basic driver (inf driver). Follow the instructions in the guide associated with your printer driver to properly install the Canon Selphy CP1300 printer drivers on your computer.
1) Install Canon Selphy CP1300 Printer Using Full Feature Driver
In this guide, I will explain the installation steps for the full feature Canon Selphy CP1300 driver on a Windows computer. These installation steps can be used for all the versions of the Windows operating system.
- Run the full feature driver file and in the Welcome screen, click on the ‘Next’ button to proceed.

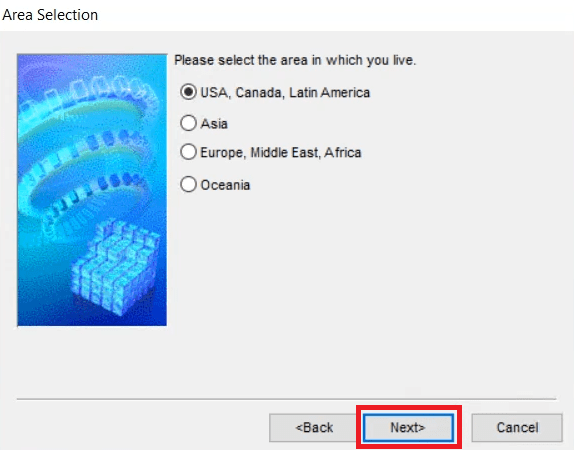
- In the Area Selection screen, choose your area, then click on the ‘Next’ button.
- In the Software License Agreement screen, click on the ‘Yes’ button to accept the license agreement.

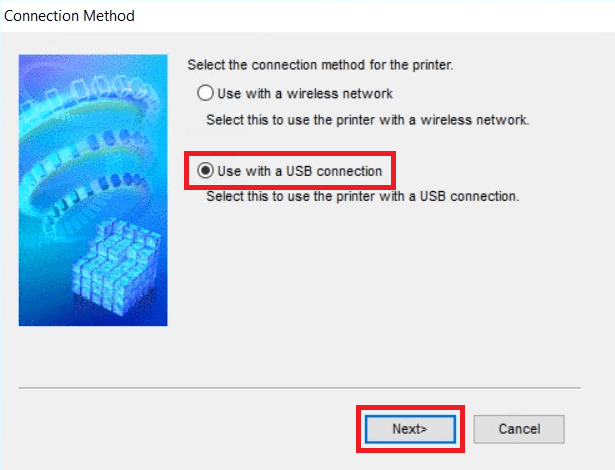
- In the Connection Method screen, choose the ‘Use with a USB connection’ option, then click on the ‘Next’ button.
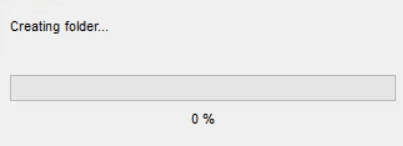
- Wait for the setup program to create the required folders on your computer.
- Connect your Canon printer with your computer by using its USB cable and switch on your printer. Wait for the setup program to detect your printer, then follow the prompts as they appear on the screen to complete the driver installation process.

That’s it, you have successfully installed the Canon Selphy CP1300 driver package on your computer. Your Canon printer is now ready for printing.
2) Install Canon Selphy CP1300 Printer Using Basic Driver
All the users who want to install this printer by using its Canon Selphy CP1300 basic drivers should follow the installation steps given below. You can follow these steps for all the versions of the Windows operating system.
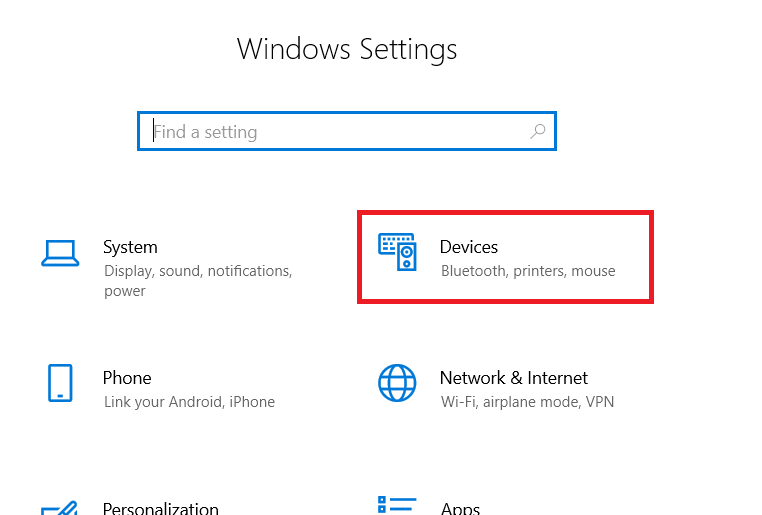
- Click on the ‘Start’ button and select ‘Settings’ from the menu.

- In the Settings page, choose ‘Devices’ option.
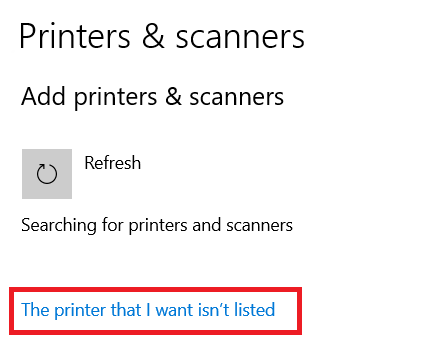
- In the Devices page, choose ‘Printers & scanners’ in the left pane, then click on the ‘Add a printer or scanner’ link.

- Click on the ‘The printer that I want isn’t listed’ link when it appears.
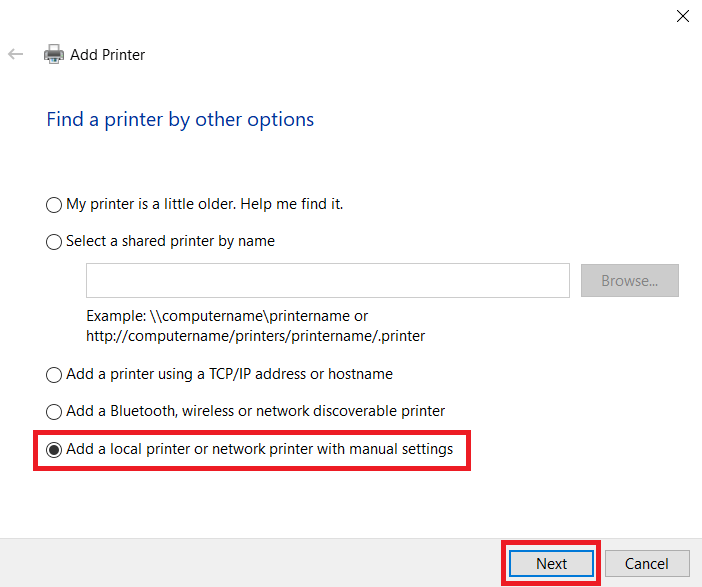
- Choose the ‘Add a local printer or network printer with manual settings’ option, then click on the ‘Next’ button.
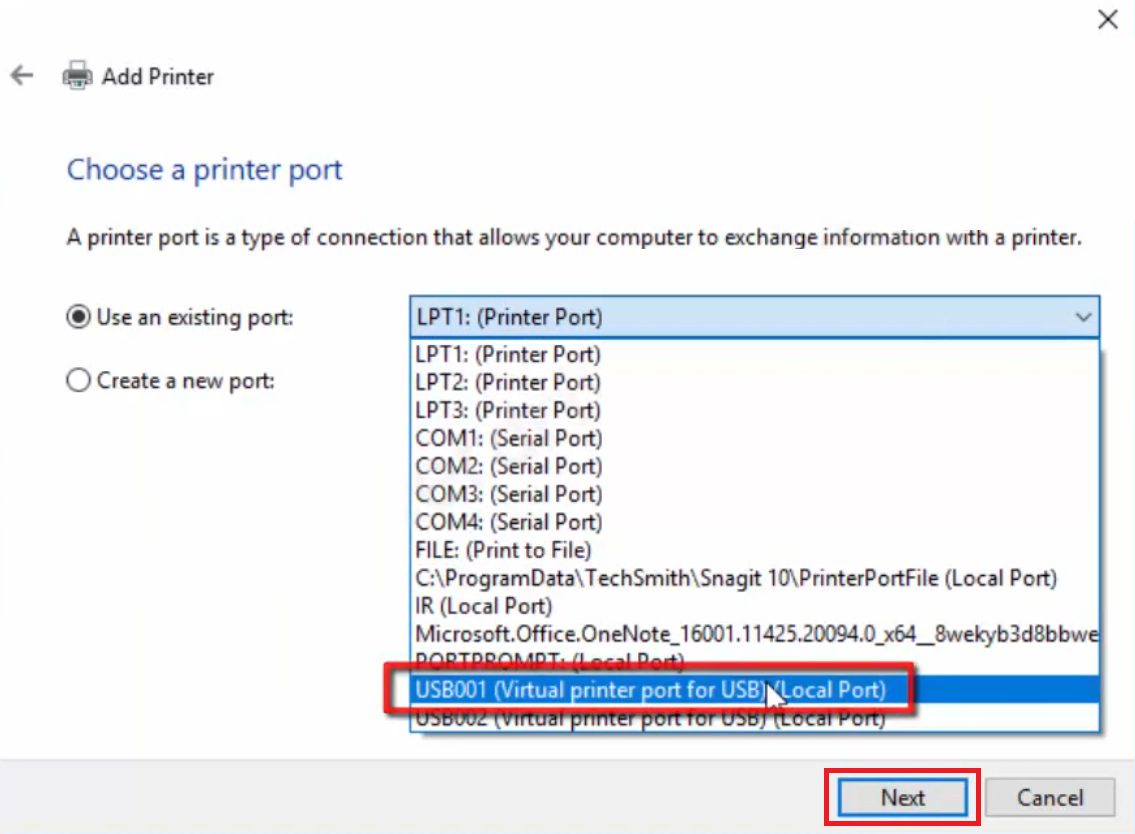
- In the Choose a printer port screen, choose the ‘USB port’, then click on the ‘Next’ button.
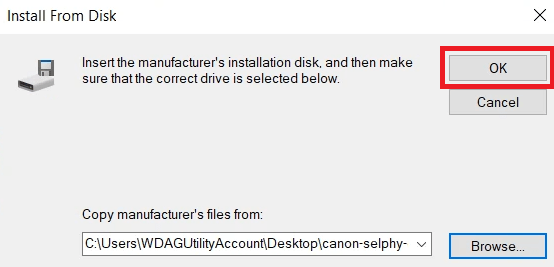
- Click on the ‘Have Disk’ button.

- Click on the ‘Browse’ button.

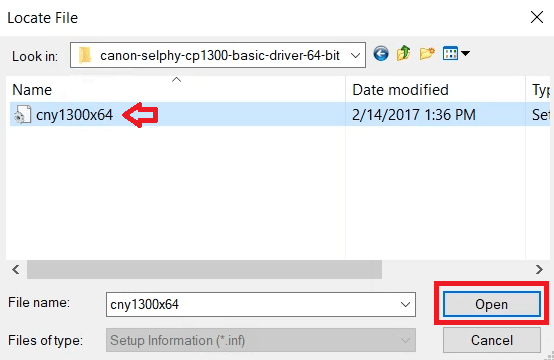
- In the Browse window, go to the folder where you have extracted the driver files, then select the ‘cny1300x64’ inf file, and click on the ‘Open’ button.
- Click on the ‘OK’ button to proceed.
- Choose the ‘Canon SELPHY CP1300’ from the list of printers, then click on the ‘Next’ button.

- Click on the ‘Next’ button and proceed with the default printer name.

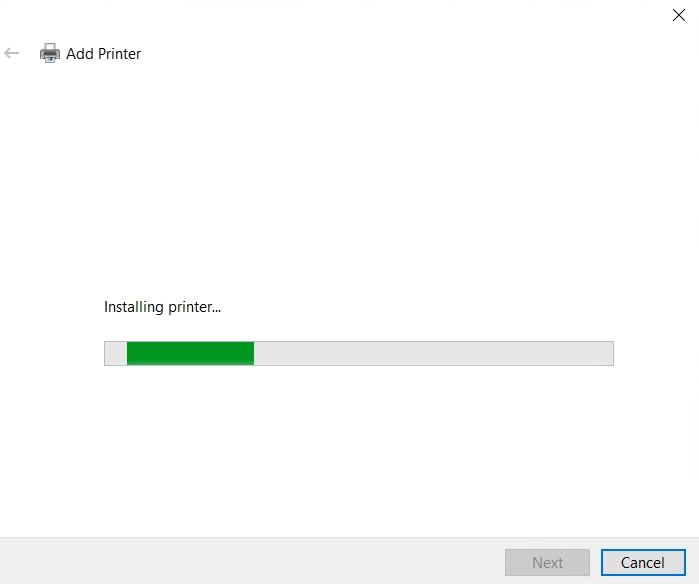
- Wait for the installation of the printer drivers.
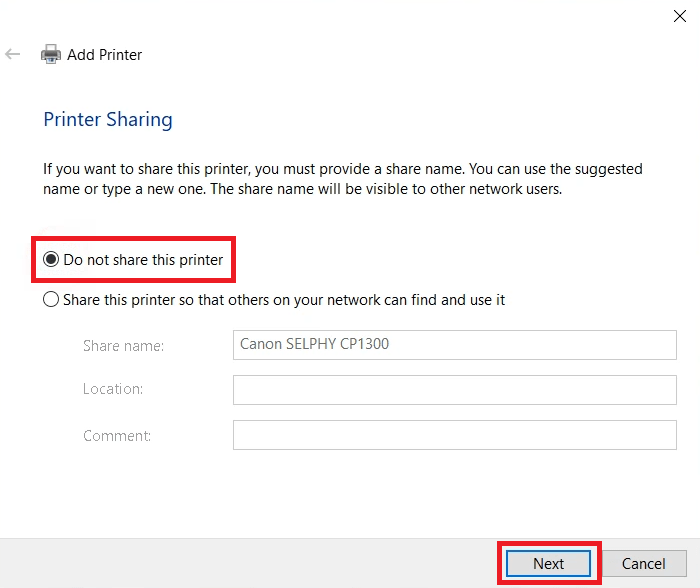
- Choose the ‘Do not share this printer’ option, then click on the ‘Next’ button.
- Click on the ‘Finish’ button to close the installer.
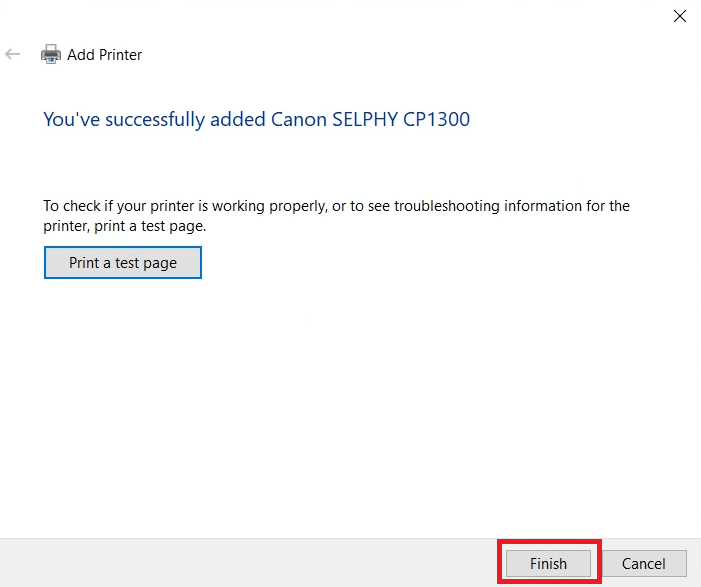
That’s it, you have successfully completed the installation of the Canon Selphy CP1300 basic driver on your computer. Your Canon printer is no ready for use.
Canon Selphy CP1300 Features
The Canon Selphy CP1300 printer is a compact photo printer, which makes it a great choice for users who want a portable photo printer. You can easily connect this printer with wired and wireless computing devices by using its USB and Wireless connectivity options.
Ink Cartridge Details
The ink for this Canon printer is available in one KP-108iN pack. This pack contains 108 printing papers along with ink cartridge.