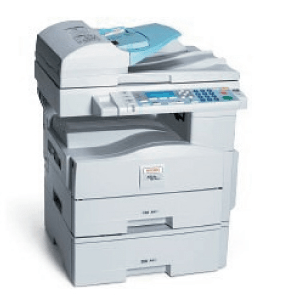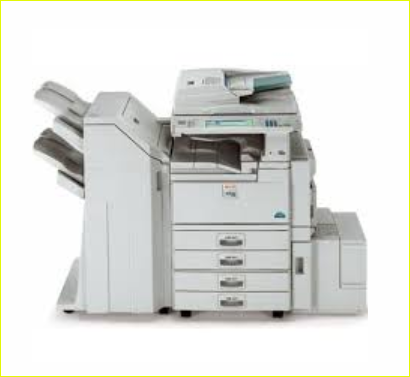
Ricoh Aficio 2035e / 2045e is an all-in-one photocopier that comes with 4 paper trays along with an additional finisher and side input tray. It is a complete machine with lots of features. You can use all these features through your computer only when you install the latest version driver on your computer. This printer can be setup on your local network using an Ethernet cable so that you can use this printer through wireless enabled devices like laptops and tabs. If you are looking for its driver, then you can download its drivers from the download section below. I have given all the supported operating system drivers.
After download, you must know the right way to install this printer. I have installed this printer on my Windows 10 64bit laptop earlier and I am sharing with you the same way that I have applied on my laptop. I advise you to follow the below given step-by-step installation guide to properly install this printer. Let’s start the installation process by downloading the drivers first.
Download Ricoh Aficio 2035e Printer Driver
To download the driver, determine the operating system version of your computer and click on the below given download link accordingly.
Driver for Ricoh Aficio 2035e Printer
Type: Full feature driver Operating System: Windows 11, 10, 8, 8.1, 7, Vista, XP File Size: 3.39 MB Version: 3.7 Download DriverOR
You may download it from Ricoh’s official website.
How to Install Ricoh Aficio 2035e Printer Driver
In order to install Ricoh Aficio 2035e printer, follow the following step-by-step instructions. I have prepared this while installing it on my computer. Please apply the following steps.
Step 1: Right-click on the driver file and click on extract to.
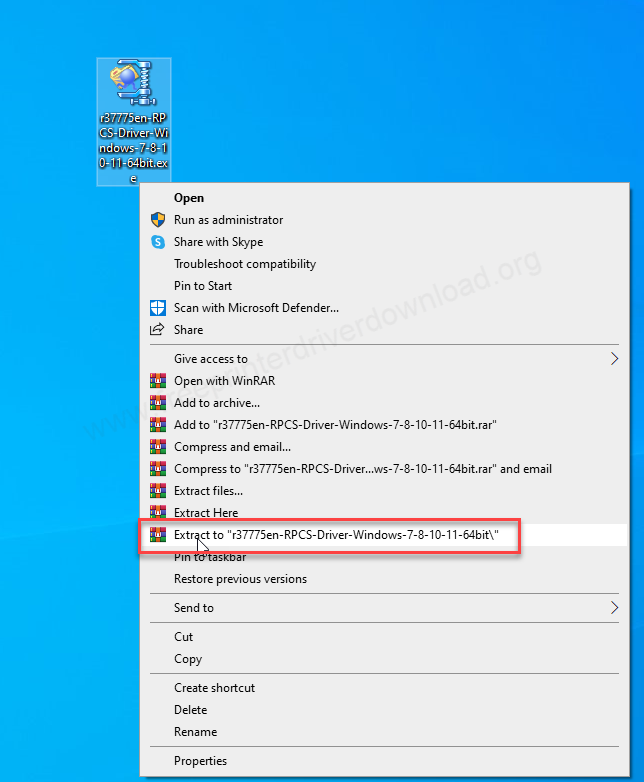
Step 2: It will extract all the driver files into a folder where you have downloaded the drivers. Open up this folder.
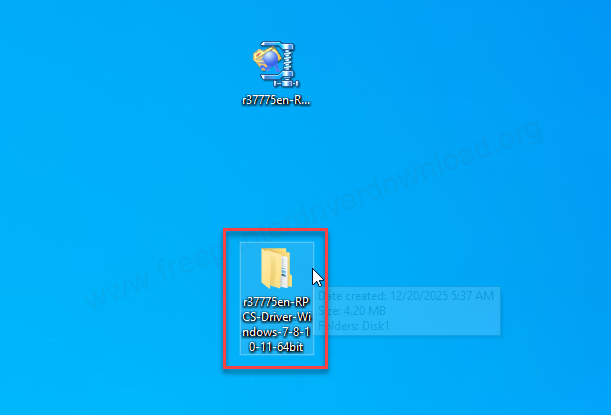
Step 3: This is the driver INF driver file which will be required when you installing it manually? For now, close this folder and remember the location of this folder, we will use it later.
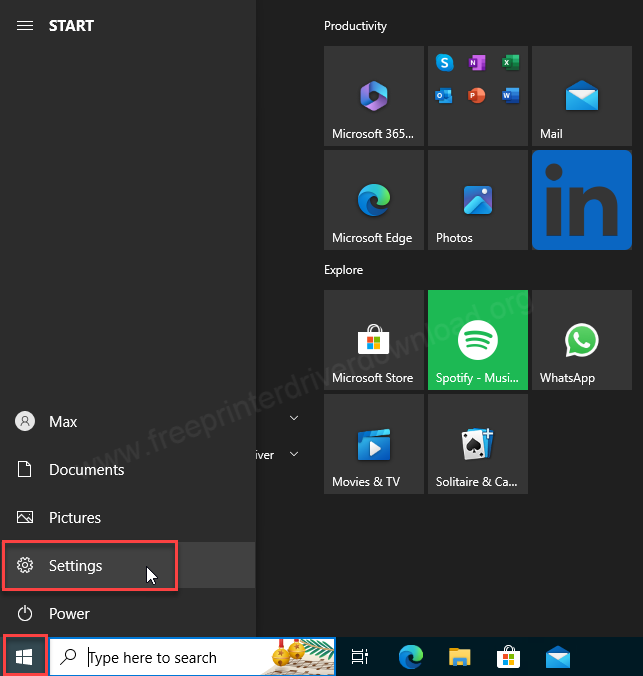
Step 4: Click on start button and then click on settings.
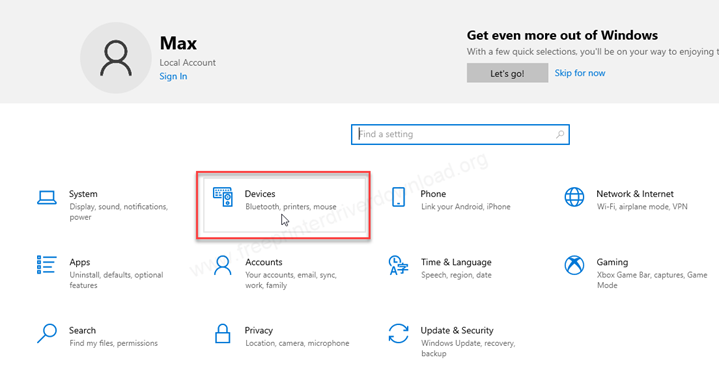
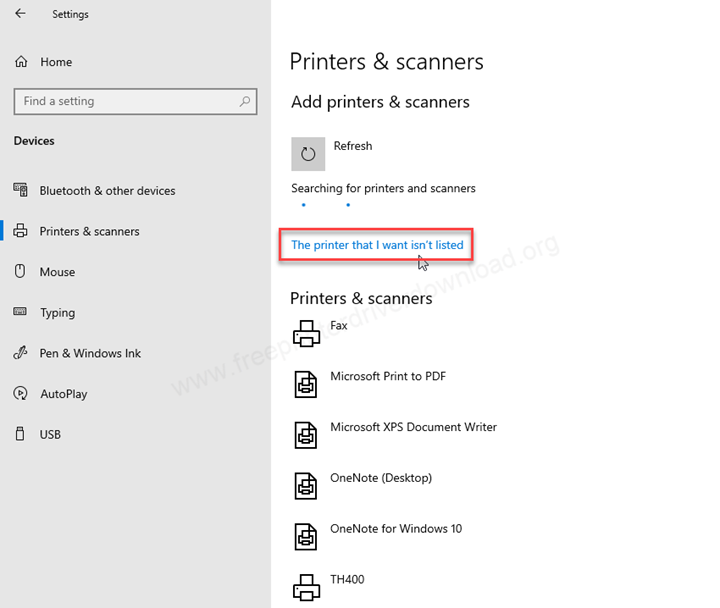
Step 5: After that, click on devices.
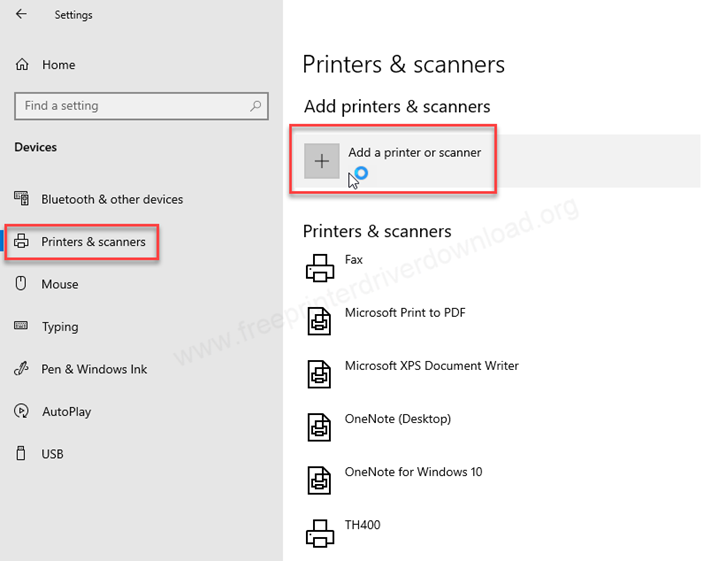
Step 6: You will get a settings page here, and you will have to click on “printers and scanners” from the left side pane and then click on the plus icon “add a printer or scanner” from the right side pane.
Step 7: Click on “The printer that I want isn’t listed”.
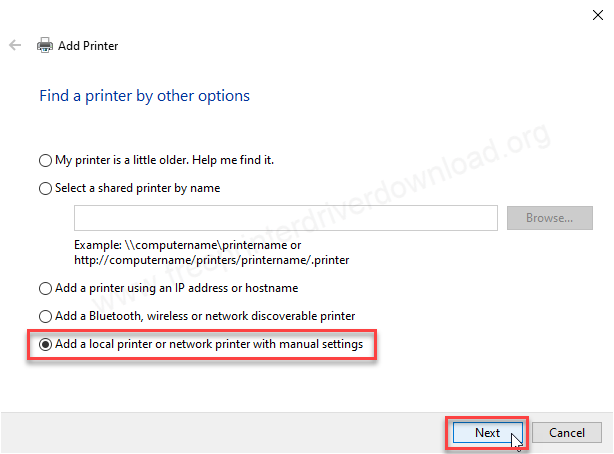
Step 8: Choose the last option “Add a local printer” and then click on Next.
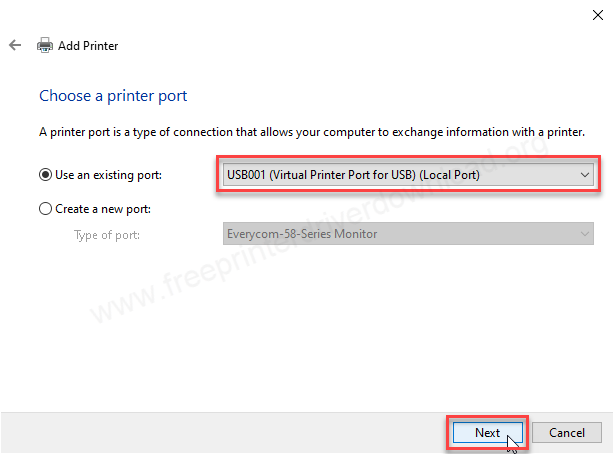
Step 9: Now it will ask you to choose a port, I recommend you to choose USB001 and then click on next.
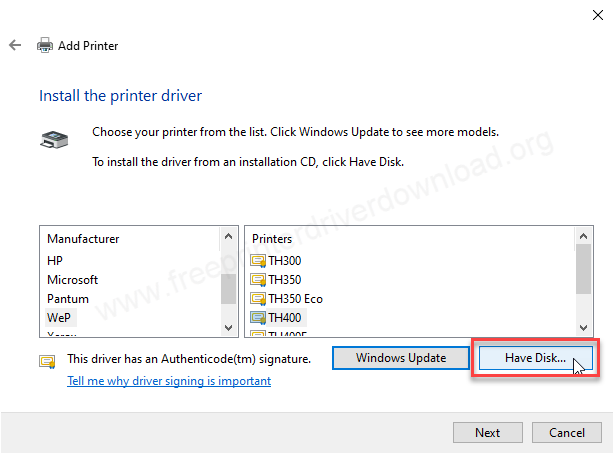
Step 10: Click on Have Disk.
Step 11: Click on the browse button.
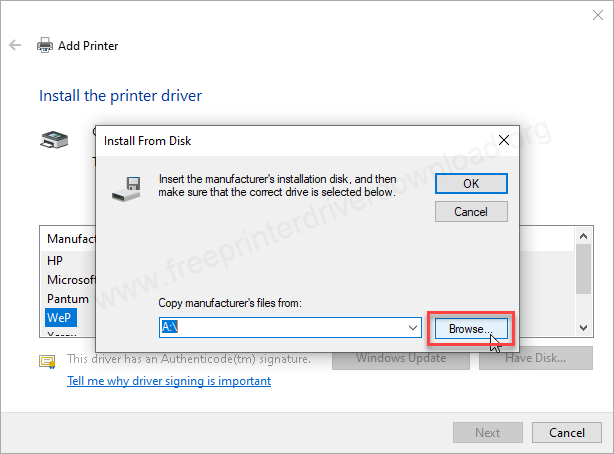
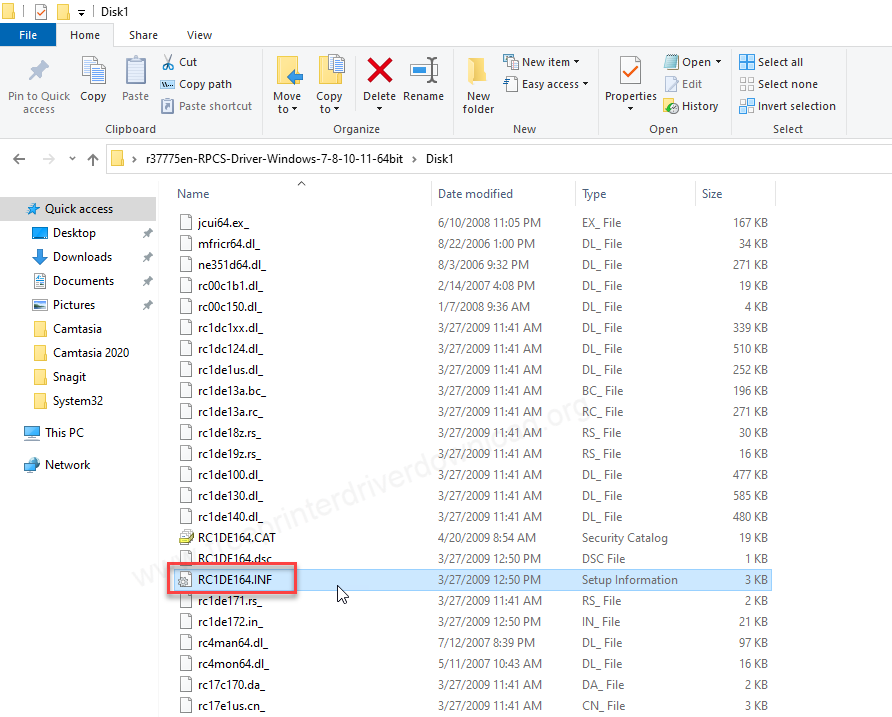
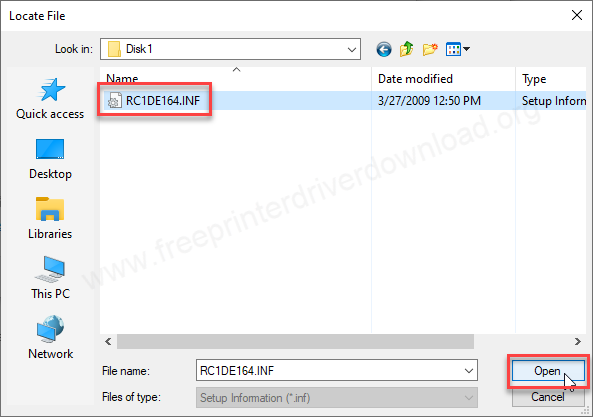
Step 12: Go to the location where you have extracted the driver files and then choose the driver file named “RC1DE164.INF” and click on open.
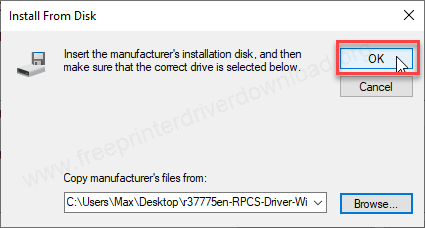
Step 13: Click on OK
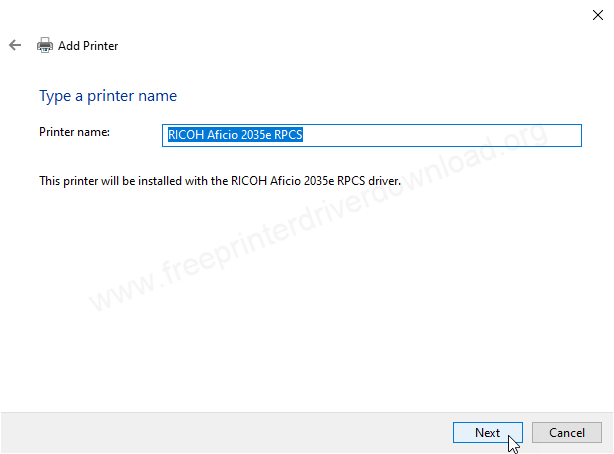
Step 14: It will show you a list of drivers, choose the model number 2035e and then click on Next. If you printer model number is 2045e then choose 2045e from the list.
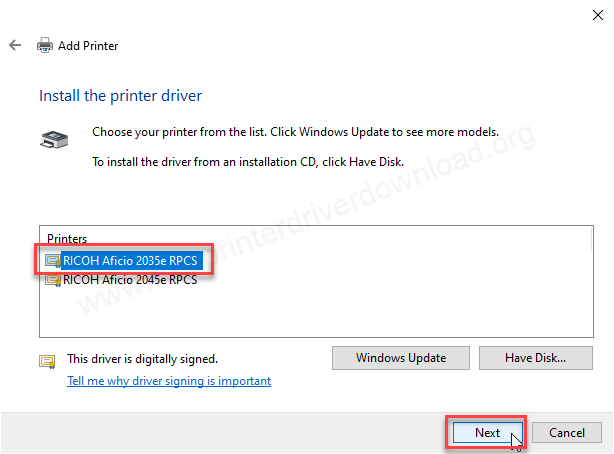
Step 15: Click on Next again.
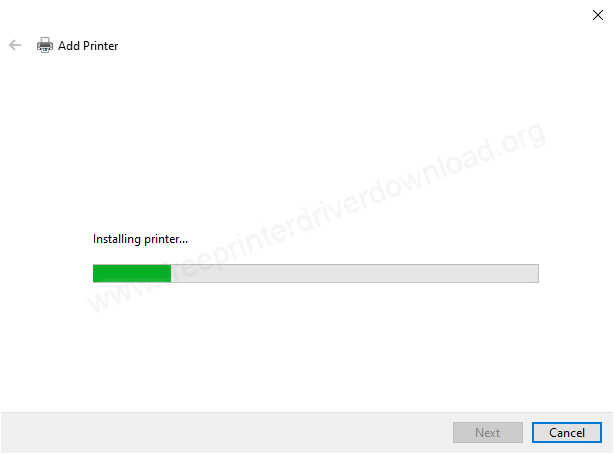
Step 16: It is being installed, so please let it be done and wait for it.
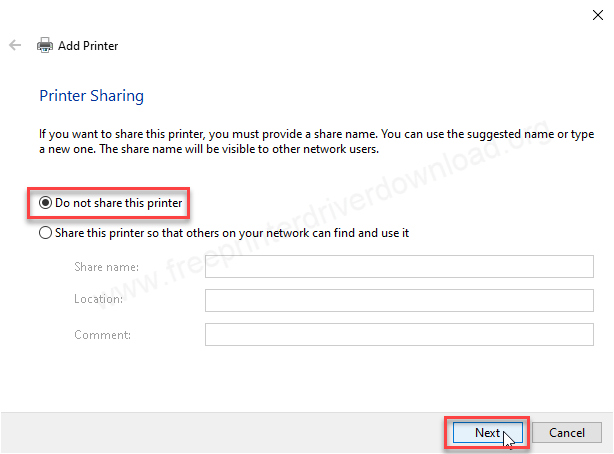
Step 17: Choose the first option “don’t share this printer” and then click on Next.
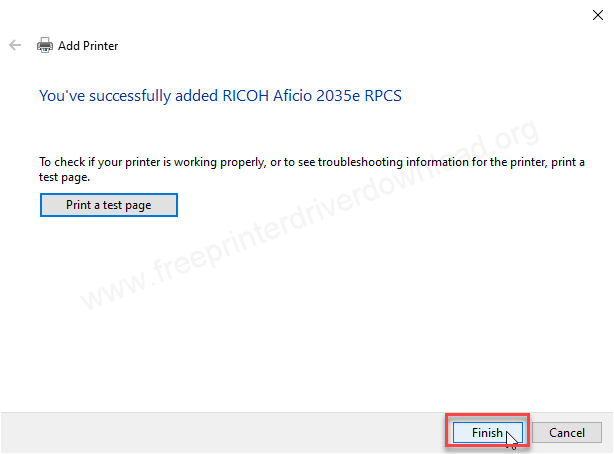
Step 18: The printer Ricoh Aficio 2035e printer has been installed successfully. Click on Finish to complete the installation process..
This is how you can install the Ricoh Aficio 2035e printer on your computer. I have installed it on my Windows 10 64bit OS, but you may apply the same steps on Windows 11, 8, 8.1 and Windows 7. The same steps will work.